Display the electronic level - EOS 7D Mark II

Article ID: ART168696 | Date published: 10/19/2017 | Date last updated: 10/31/2017
 

Description

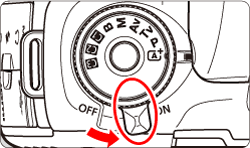
Learn how you can display the electronic level on the camera to help compose a shot.

Solution

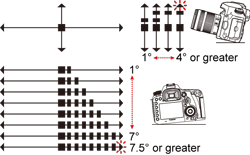
You can display the electronic level on the LCD screen and in the viewfinder to help you correct camera tilt.


Steps for displaying on the LCD screen

  1. Turn <ON> the camera.
    Turn on the camera
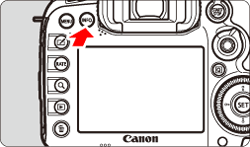
  2. Press the <INFO.> button until you see the electronic level.

    Note: If the electronic level does not appear, change [  button display options] so that the electronic level can be displayed.
  3. Check the tilt of the camera. The horizontal line is white and the actual tilt is read (shown in one degree increments).
  4. Tilt the camera until the red line turns turns green. The margin of error is ±1°.
    LCD level indicator
    Note: During Live View shooting and before movie shooting (except with + Tracking), you can also display the electronic level as described above.
 

Steps to display in the viewfinder

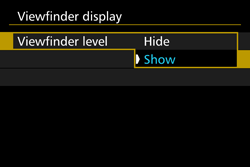
An electronic level can be displayed on the upper part of the viewfinder. This is helpful to correct camera tilt while shooting.

  1. Press the <MENU> button to display the menu screen.
    Menu button
  2. Press the <> 
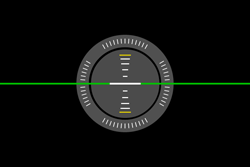
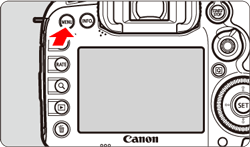
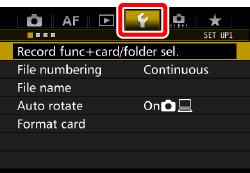
button and select the [  ] tab.
    Q button Wrench tab 
  3. Turn the <> 
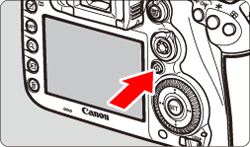
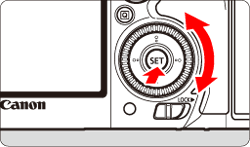
dial to select the [  ] tab.
     Rotary dial Second page of the wrench tab
  4. Turn the <> 
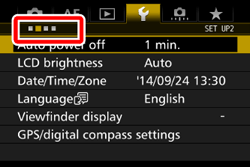
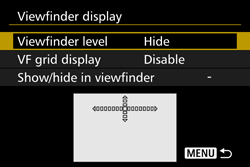
dial to select [Viewfinder display], then press <>.
     Multifunction button Viewfinder display selection
  5. Turn the <> dial to select [Viewfinder level], then press <>.
    Viewfinder level selection
  6. Turn the <> dial to select [Show], then press <>.
    Show
  7. Press the shutter button halfway and the electronic appears in the viewfinder for horizontal or vertical shooting.
    Iconography of the viewfinder level

Rate this Article
Was this article helpful?
Yes, This document is helpful
No, This document needs a clearer explanation
 
Please provide your comments