To print a picture from the Canon PRINT app, follow the steps below.
 The images in this article may look slightly different depending on the iOS® device you use.
Print a picture
-
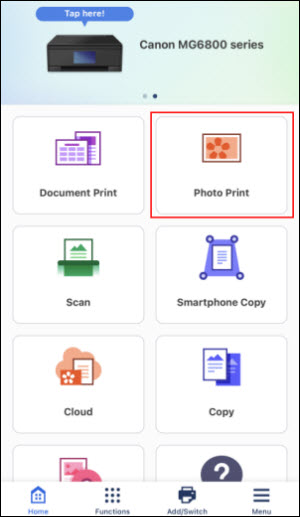
From the main screen, tap Photo Print.
-
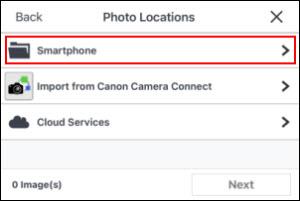
You'll have the option to print images stored on your device, import images from Canon Camera Connect, or images stored on cloud services. In this example, images stored on the device will be used. Tap Smartphone.
-
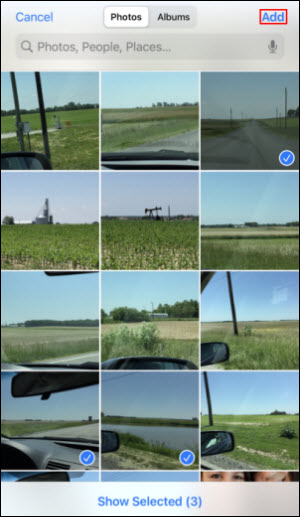
The images stored on your device are shown. You can select up to 20 images. Tap on the image(s) you want to print, then tap Add.
You can select images stored in specific albums on your device by tapping Albums, then selecting the album and images.
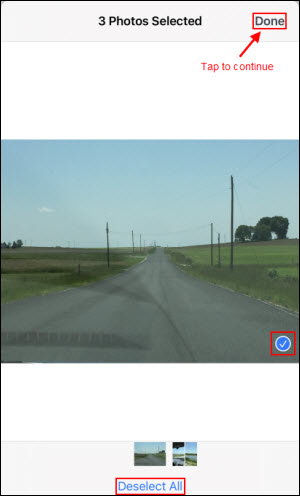
 You can tap Show Selected to view the image(s) you selected for printing. You can swipe through the image(s), and if you don't want to print an image, you can either tap the check mark on the image, or tap Deselect All. Tap Done when finished.
-
You'll return to the Photo Locations screen. Tap Next.

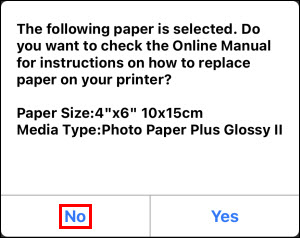
If you see a message similar to this, tap No.
-
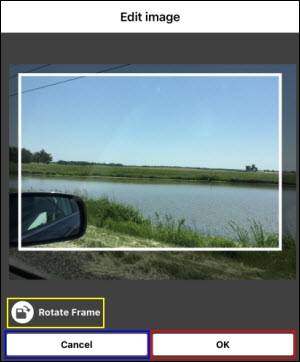
If you want to crop the image, tap the crop icon.

 Not all models that are supported by Canon PRINT will support the cropping function (for example, the SELPHY CP1300 is a model that does not support this). Also, depending on the model of printer you are using, this screen may look slightly different. Rather than a cropping button, you may see a button that says Edit Image. If you see this button, tap it, and get the following message:
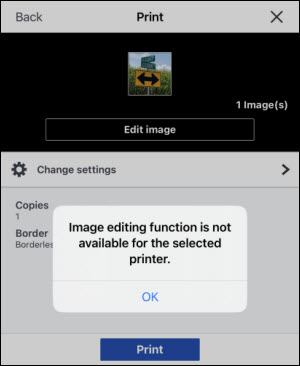
Tap OK. You will not be able to crop the image. Skip to step 7.
-
Pinch to zoom on the area you want to print. Move / rotate the frame to select the portion you want to save. You can also tap Rotate Frame to switch between portrait and landscape orientation. Select OK to crop the image or Cancel to exit. You will return to the Print Preview screen.
-
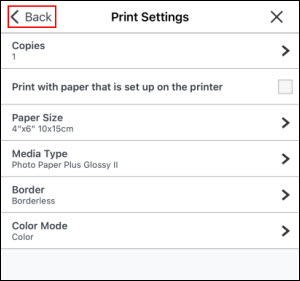
Tap Print Settings to change print settings (paper size, media type, bordered / borderless, etc.).
-
Tap Print to print the image or Deselect if you decide not to print.
The available print setting may differ depending on the printer model being used.
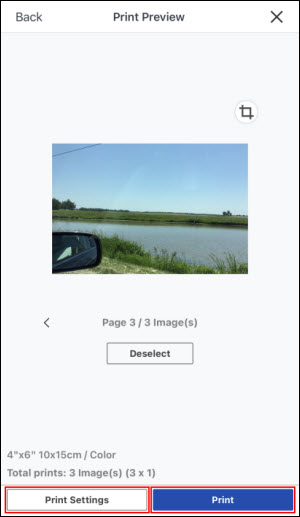
If you tap Print Settings, make any adjustments needed, then tap Back to use the settings specified. Tap Print after tapping Back. Note that the settings available may vary by model.
Good to know
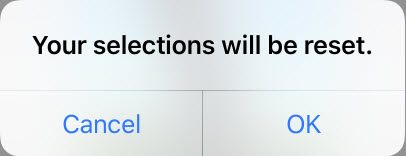
Tap  at any time to return to the main screen.
If you selected an image, you may receive a prompt that your selections will be reset. Tap OK to reset any selections and return to the main screen. Tap Cancel if you don't want to return to the main screen.
If your product issue was not resolved after following the steps above, or if you require additional help, please create or log in to your Canon Account to see your technical support options.
Or if you still need help, visit our Canon Community by clicking the button below to get answers:

____________________________________________________________________________________________
