Saving Scanned Data to PC Using the Operation Panel of the Machine
You can scan images using the Operation Panel of the Machine.
 Important
-
If the software (MP Navigator EX) is not yet installed, refer to your setup manual.
-
Do not insert or remove USB cables when scanning images with the machine, or when the computer is in the sleep or standby mode.
-
 Set the Starting application.
You need to set MP Navigator EX as the starting application software in Image Capture under Applications of Mac OS X.
This operation is not necessary for Mac OS X v.10.4.x.
If you are using Mac OS X v.10.3.9:
Select Applications on the Go menu, then double-click the Image Capture icon. Click Options at the lower left of the scanner window, select MP Navigator EX 2 in Application to launch when the scanner button is pressed, then click OK. To quit Image Capture, select Quit Image Capture on the Image Capture menu.
 Important
-
If Options is not displayed, select Preferences on the Image Capture menu, click Scanner, and click Use TWAIN software whenever possible to clear the option. Then quit Image Capture and restart it.
-
Make sure that the machine is turned on.
-
Press the Menu button.
-
Use the 
 button to select Scan, then press the OK button.
The screen for selecting to which you save the data is displayed.
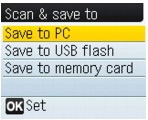
-
Select Save to PC, then press the OK button.
Load the original on the Platen Glass following the instruction on the LCD.
 Note
Note
-
Press the OK button.
The settings configured from MP Navigator EX apply when scanning.
-
 To specify MP Navigator EX 2.0
If you are using Windows Vista:
The program selection screen may be displayed after pressing the Color or Black button. In this case, select MP Navigator EX Ver2.0 and click OK.
You can set MP Navigator EX to launch whenever pressing the Color or Black button. For details, refer to Selecting a Response to Commands from the Operation Panel Using MP Navigator EX.
If you are using Windows XP:
The program selection screen may be displayed after pressing the Color or Black button for the first time. In this case, specify MP Navigator EX 2.0 as the application software to use, select Always use this program for this action, then click OK. From the next time, MP Navigator EX is automatically started.
Important
-
If You Want to Edit or Print the Scanned Images
MP Navigator EX enables you to edit the scanned images, such as optimizing or trimming.
You can also start application software from MP Navigator EX to edit or print the scanned images.
-
If You Want to Scan Originals with Advanced Settings
ScanGear enables you to scan originals with advanced settings such as the resolution.
Note
Page top
Selecting a Response to Commands from the Operation Panel Using MP Navigator EX
MP Navigator EX enables you to specify the response resulting from pressing the Color Start or Black Start button on the machine. You can specify the response individually for each event.
-
Start MP Navigator EX.
-
Click Preferences.
The Preferences dialog box opens.
Note
-
On the Scanner Button Settings tab, specify Actions.
-
Click OK.
The operation will be performed according to the settings when you press the Color Start or Black Start button on the machine.
Page top