
Scanning using OmniPage SE 1.0
| Article ID: ART157907 | | | Date published: 06/09/2015 | | | Date last updated: 08/17/2015 |
Description
Scanning using OmniPage SE 1.0
Solution
OmniPage SE 1.0
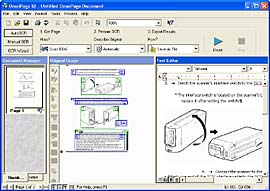
| OmniPage SE is an optical character reader (OCR) program that converts scanned text data from sources such as books and newspapers into editable text. The converted text can be loaded into OmniPage SE's Text Editor to make any necessary corrections to the text generated with the automated character recognition engine. | ||||||
|
Scanning
See "Scanning with OmniPage SE" for Windows or Macintosh, in the "Initiating a Scan" section.
|
|||
| Use the following procedures to scan with OmniPage SE, the OCR program bundled with your scanner. |
| Position an item on the document glass of the scanner. | |
 |
|
| Start OmniPage SE. Click the [Start] menu and select [(All) Programs], followed by [ScanSoft OmniPage SE] and [OmniPage SE]. |
|
 |
|
| OmniPage SE will start. Use the following procedures the first time you use the program to select the scanner and startup settings. You can skip to Step 9 the next time you use the program. |
|
| Make sure that [Auto OCR] is selected in the control section. Select a scanning mode (B&W, Grayscale or Color) in the [1. Get Page, How?] section. Then click the [Start] button. |
|
 |
|
| The Scanner Setup Wizard will open the first time you click this button. Make sure that your scanner appears in the Scanning source category, place a check mark in the [Select scanning source] and click the [Next] button. In the next dialog, click the [Finish] button. | |||
|
|
|||
| The scanner will start to scan the document. Then the program will automatically set the area to analyze and begin the character recognition process. If the OCR Proofreader dialog appears, manually correct characters as required. |
|
 |
|
| Specify the save folder, file name and file type for the converted text data. | ||||
 |
||||
|
||||
| The saved file will be opened in the application program corresponding to the selected file format. | ||||
 |
||||
|
|||
| Use the following procedures to scan with OmniPage SE, the OCR program bundled with your scanner. |
| Position an item on the document glass of the scanner. | |
|
|
| Start OmniPage SE. Open the [OmniPage SE] folder and double-click the [OmniPage SE] icon. |
|
| Click the [Edit] menu and select [Preferences]. | |
| (This step is required only for the first time you use this software.) | |
 |
|
| In the Preferences window, click the [Select] button in the Scanner category. Select [ScanGear CS 7.1] . Click the [Save] button to close the Preferences window. | |
 |
|
| In section [1], select [Scan Image] and click the [1-2-3] button. | |
 |
|
 |
|
| The ScanGear CS window will open. Specify a [Type of original], click the [Preview] button to preview the image, select a scan area, and then click the [Scan] button. | |
 |
|
| The scanner will start to scan the document. Then the program will automatically set the area to analyze and begin the character recognition process. | |
| Specify the save folder, file name and file type for the converted text data. | ||||
 |
||||
|
||||
SIMS Doc Id
0