If you see Code 7100, it means a printer error occurred.
Follow the steps below to clear the error.
Check for obstructions behind the front cover
-
Turn the printer OFF.
-
Open the front cover and check for anything that blocks the paper path.
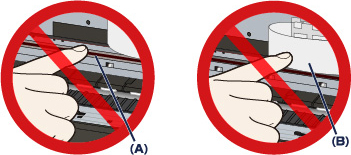
 Don't touch the clear film (A) or the white belt (B). Doing so may damage the printer.
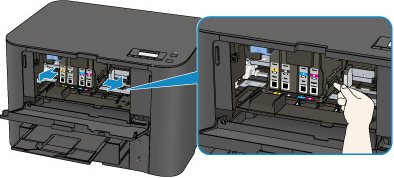
- If you find a paper jam, press the right or left side of the print head holder with your fingertips, then slide it slowly to the right edge or left edge (whichever allows you to remove the jam).
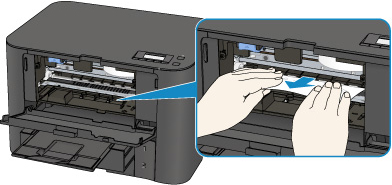
- Hold the paper with your hands and slowly pull it out.
- Remove all the paper pieces before you close the front cover.
Check for obstructions behind the rear cover
-
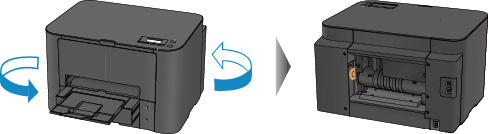
Rotate the printer so that the rear side of the printer faces toward you.
-
If the protective material for the rear cover is attached, remove it.
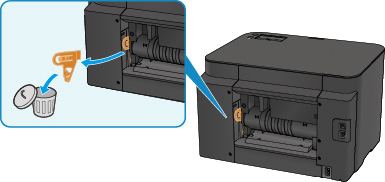
-
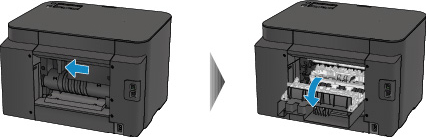
Slide the rear cover to the left to open it.
-
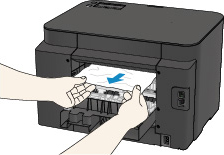
Slowly pull out the paper.
Don't touch the inner parts of the printer.
If you can't pull the paper out, try the following:
-
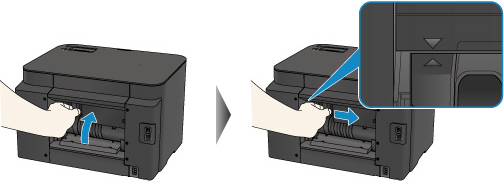
Slide the rear cover slowly to the right to close it. The up  mark on the rear cover should align with the down
  mark on the printer.
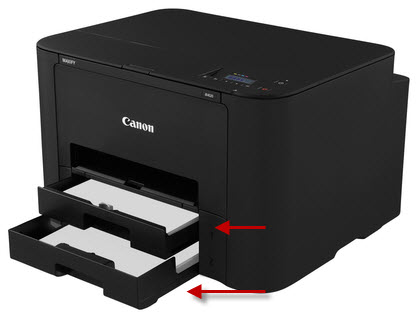
Check for obstructions behind the paper trays
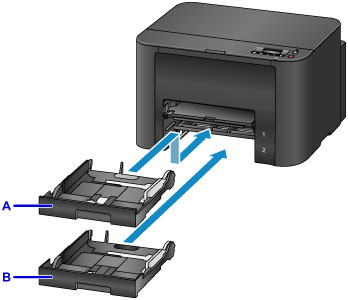
- Remove the paper trays (cassettes) from the printer.
- Check inside the printer for obstructions or paper jams and remove anything you find.
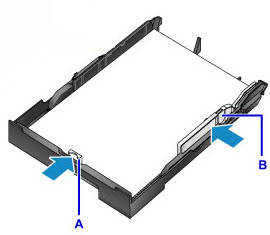
- Remove each paper stack, make sure it's straight, then replace it and adjust the front (A) and side (B) paper guides to fit the paper.
- Reinsert the cassettes.
- Turn the printer back ON and check to make sure the error message is clear.
If your product issue was not resolved after following the steps above, or if you require additional help, please create or log in to your Canon Account to see your technical support options.
Or if you still need help, visit our Canon Community by clicking the button below to get answers:

____________________________________________________________________________________________
