Preparing to Transfer the Printer:
The maintenance cartridges needs to be replaced when you execute the Prepare to transportation menu. Prepare the maintenance cartridge in advance while referring to the table below. The number of maintenance cartridge required varies depending on the amount remaining in the maintenance cartridge being used.
Selecting Menu for Prepare to transportation
-
If touch screen indicates to replace maintenance cartridge, replace maintenance cartridge.
Flick Home screen and tap Maintenance.
-
 Touch Screen
The Maintenance screen appears.
-
Tap Prepare to transportation.
-
Select and tap transfer level.
Displays the confirmation screen.
- Tap Yes.
When the preparation is finished, instructions appear on the touch screen.
Remove the ink tanks before packing the printer.
The printer is now prepared for transfer.
Removing Ink Tanks:
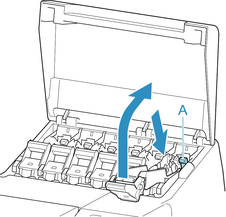
- Open left and right ink tank covers to remove all ink tanks.
-
Push down release lever (A) as shown as you gently return all ink tank lock levers to their original positions.
-
Close ink tank covers.
At this point, ink is drawn out from inside the tubes.
A confirmation message will appear when the process is finished.
 Important
- Do not remove the maintenance cartridge except when the message indicating replacement is displayed.
- If you remove the maintenance cartridge while ink is being removed, the ink may leak out.
-
Replace maintenance cartridge currently being used with new maintenance cartridge.
- Press ON button and turn off printer.
Pack the printer:
-
Disconnect power cord and interface cable.
Important
-
Turn off the printer before you unplug it. Unplugging the printer before it is off and moving it may damage the printer. If you accidentally unplug the printer, plug it in again, reinstall the ink tanks, and follow this procedure again.
-
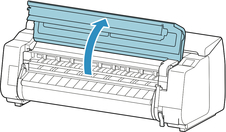
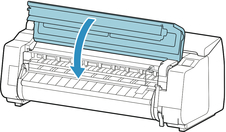
Open top cover.
-
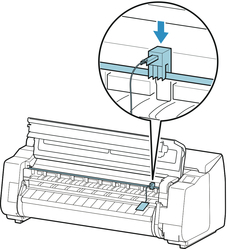
Grasp Belt and insert Belt Stopper into position shown.
Important
-
Attach the Belt Stopper that was removed and stored after initial installation. Neglecting to attach the Belt Stopper may damage the printer.
-
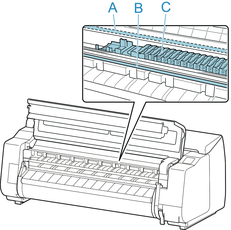
Never touch the linear scale (A), carriage shaft (B), or ink tube stabilizer (C). Touching may damage them.
-
Close top cover.
-
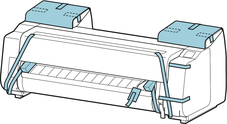
Tape down printer covers to secure them, in the reverse order of tape removal during installation.
-
Remove basket by reversing installation procedure.
-
Remove the Stand by reversing the installation procedure, when it was attached to the printer.
-
Disassemble and repackage the Stand by following the installation procedure in reverse.
-
Repack Roll Holder, holder stopper, and printer in shipping materials, and then package them in shipping box.
Online Reference Preparing to Transfer the Printer
PRO-2000
PRO-4000
PRO-4000S
PRO-6000
PRO-6000S