You can preset a number of picture-related settings. After changing individual settings to your preference, you can save the whole set in the camcorder or on an SD card as a custom picture file. You can then load the file at a later date to change the current settings to the preset levels you selected. You can even ad custom picture settings to MXF clips recorded on a CF card.* * You can also make settings so that they are not saved together with MXF clips. Please note that they cannot be saved together with MP4 clips or still images. This section explains how to preset the custom picture settings and select custom picture files for shooting. NOTE Custom picture files created with this camcorder are compatible only with other XF205 camcorders.
Registering Custom Picture Styles If you preset the image quality settings that are frequently used for shooting as a custom picture setting, you can easily use this setting for the next shooting by selecting it from the list. You can save up to 9 different custom picture files on the camcorder and up to 20 custom picture files on an SD card. Custom picture files can be copied between the camcorder and SD card. 1. Hold down the button on the <POWER> and slide the switch to <CAMERA>.
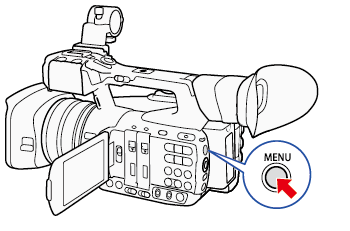
 2. Select a custom picture file you want to preset. 2-1 Press the <MENU> button. Press the <SET> button as necessary.
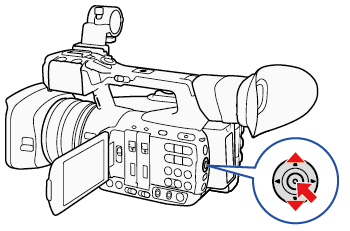
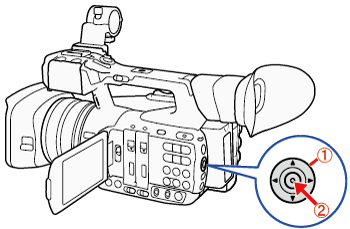  : Joystick  : In the following procedures, 'Press <SET>' refers to the action of pressing the joystick straight down to select the desired setting. 2-2 Select [  ] Camera Setup -> [Custom Picture], and then press the <SET> button.
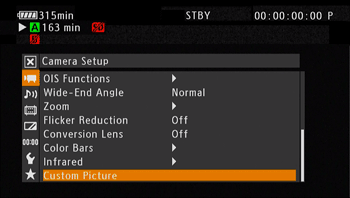 - The CP (Custom Picture) menu appears, and then the currently selected custom picture file name appears. The default custom picture file is [Off].
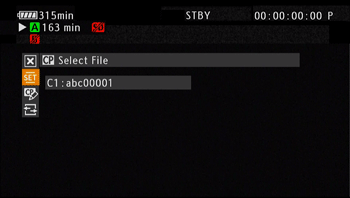
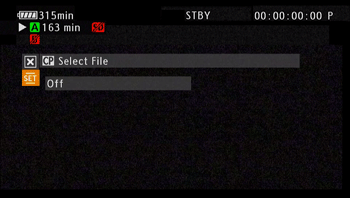 2-3. Select [  ] (Select File) and then press <SET>. A list of custom picture files saved to the camcorder and the SD card appears.
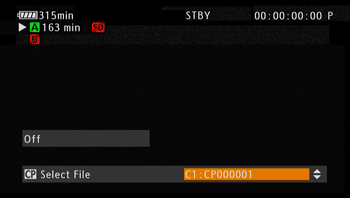 - Files in the camcorder begin with [C1] to [C9]; those on the SD card begin with [SD1] to [SD20].
2-4. Push the joystick up/down to select (Select File) and then press <SET>.
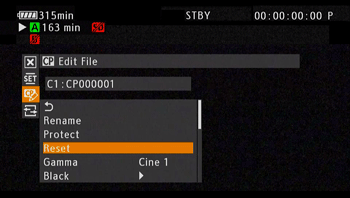
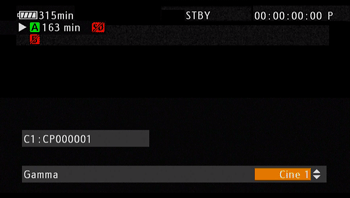
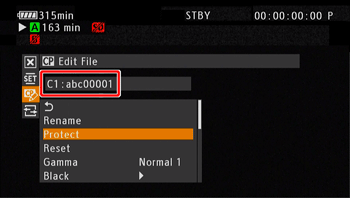
 3. Editing a custom picture files settings In this example, Gamma has been set to [Cine 1]. 3-1. Select  [ Edit File] -> [Gamma]
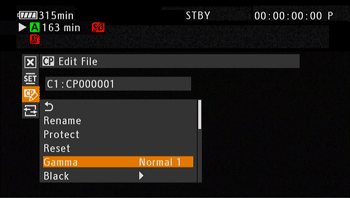 3-2. Select [Cine 1] and then press <SET>.
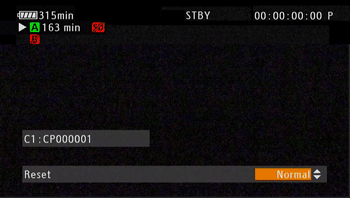
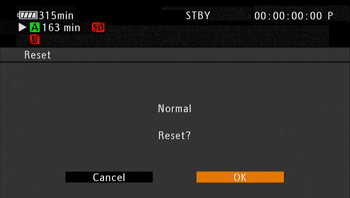
 REFERENCE Resetting the current files settings to default values 1. Select [Reset] and then press SET. 2. Select the default values and then press <SET>. - Select [Normal] to reset to neutral default values (equivalent to not using custom picture settings at all) or [Wide DR] if you want to replicate the preset settings, for example as a starting point to edit them further.
3. Select [OK] and then press <SET>.
4. Renaming Custom Picture Files 4-1. Select [Rename] and then press <SET>.
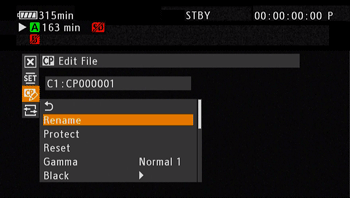 - A screen appears that displays the current file name with an orange selection frame on the first character.
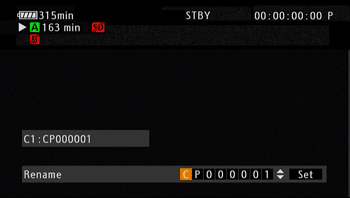
4-2. Push the joystick up/down to select an alphanumeric character or symbol then push it right to move to the next field. Then, press <SET>. - Change the rest of the name in the same way.
4-3. Repeat the steps from 4-2. Then, select [Set] and then press <SET>.
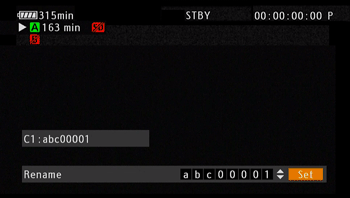 - The custom picture files name will be set.
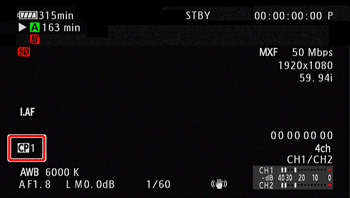
 4-4. Press the <MENU> button. The CP menu will be closed and the selected styles number ([  XX ],or [  XX ]) will be displayed.
 REFERENCE - You can save up to 9 different custom picture files on the camcorder and up to 20 custom picture files on an SD card.
- You can protect the custom picture files as necessary.
- By default, the custom picture files in the file slot [C9] is protected. To edit the protected files, it is necessary to first remove the protection. For details on how to edit the protected custom picture files, please see the camcorders instruction manual.
Selecting Custom Picture Files for Shooting If you preset the custom picture settings beforehand, you can modify image quality to your preference by selecting a custom picture file form the list. 1. Press the <MENU> button. 2. Select [ ] [Camera Setup] -> [Custom Picture] and then press <SET>. The CP menu appears, and then the currently selected custom picture file name appears.
 3. Select [ ] (Select File) and then press <SET>. A list of custom picture files saved to the camcorder and the SD card appears.
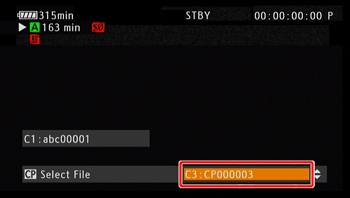 4. Select a custom picture file from the list and then press <SET>. The setting is now modified to the preset setting. NOTE When you are not using the custom picture function, select [OFF] and then press <SET>.
5. Press the <MENU> button to close the CP menu.
|