How to delete and rebuild the ZoomBrowser EX 3.x database
Contents:
Deleting the current database
Creating a new database
Adding additional image folders
Deleting the current database
- Close all programs and open windows.
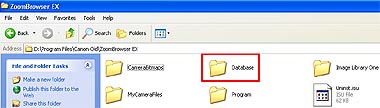
- Open 'My Computer'.
- Double-click the C: drive.
- Double-click [Program Files].
- Double-click [Canon].
- Double-click [ZoomBrowser EX].
- Double-click [Database].
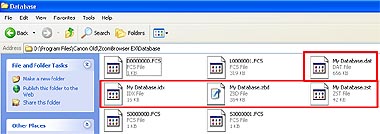
- Delete all the files named 'My Database'.
- There are usually 4 files with this name, each with a different extension. Delete all of them, even if there are more than four.
- Close all windows to return to the desktop.
Back to top
Creating a new database
- Start ZoomBrowser EX.
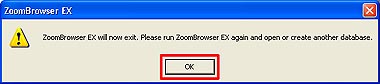
- Typically, the first time ZoomBrowser is opened after deleting the corrupt database, an error message will display. When this occurs, click [OK].

- Another message will pop up to say that ZoomBrowser will exit. Click [OK].
- Start ZoomBrowser again.
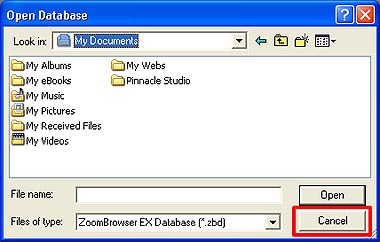
- An 'Open Database' window will pop up. Click [Cancel].
- Click 'File', and then 'Database'.
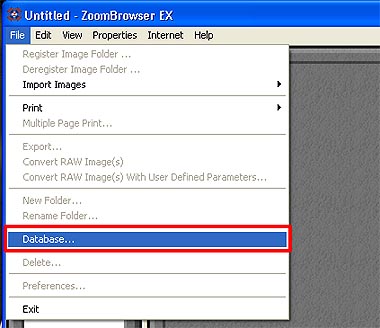
- The ZoomBrowser EX Database window will pop up. Click [New].
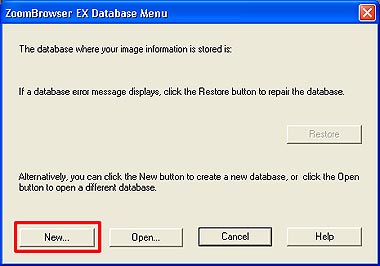
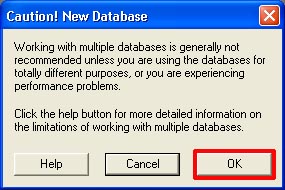
- A warning window will pop up. Click [OK].
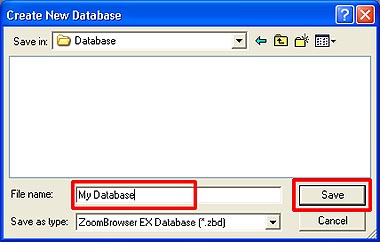
- Another window will appear. Click the down arrow next to the 'Save In' box at the top of the window.
- Click [C:].
- Double-click [Program Files].
- Double-click [Canon].
- Double-click [ZoomBrowser EX].
- Double-click [Database].
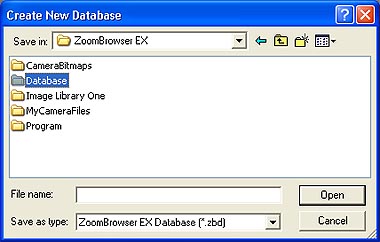
- Type the words "My Database" (without the quotation marks) in the filename box at the bottom of the window, and click [Save].
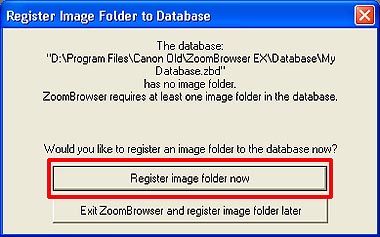
- Another window will pop up. Click [Register image folder now].
- Double-click [C:].
- Double-click [Program Files].
- Double-click [Canon].
- Double-click [ZoomBrowser EX].
- Click on [Image Library One] to highlight it.
- Click [OK].
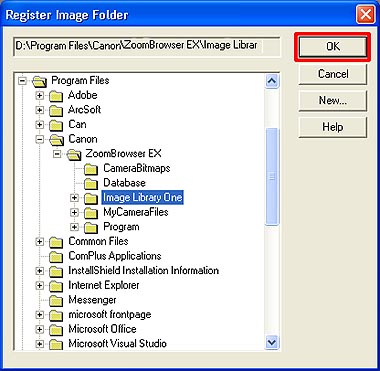
- Click [OK] on the warning window.
- Depending on the number of images stored in the Image Library One folder, and the system resources of the computer, it could take a while for ZoomBrowser to add all the thumbnail images and build the new database.

Back to top
Adding additional image folders
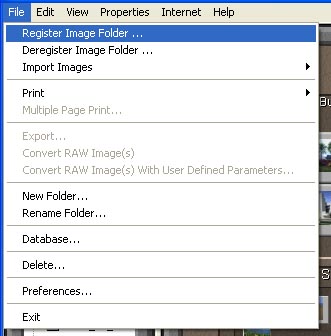
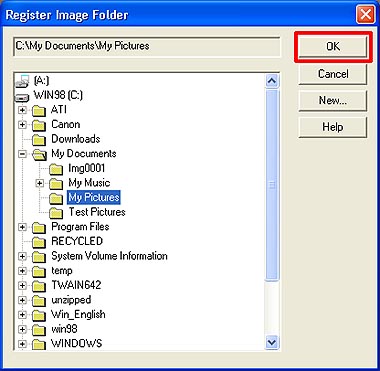
- Click 'File', then click 'Register Image Folder'.
- Double-click the drive letter (i.e. [C:]).
- Browse to wherever the image folder is located (i.e. C:\My Documents\My Pictures)
- Click [OK].
- Click [OK] on the warning window.
- Depending on the number of images stored in the Image Library One folder, and the system resources of the computer, it could take a while for ZoomBrowser to add the thumbnails for all the images into ZoomBrowser.
Back to top
