Preparing the Main Power Supply
You can power the camera using a commercially available V-mount battery or the DC IN 12V terminal. Even when a battery is attached, if a power source is connected to the DC IN 12V terminal, the camera will not draw power from the battery.
Acceptable Power Sources
When selecting commercially available batteries and power adapters, make sure the external power source meets the following specifications and all the safety standards of the country/region where it is used. Closely follow the manufacturer's instructions regarding the use and maintenance of power sources.
| Power source |
Specifications |
| Battery |
V-mount battery, 12 V to 20 V DC |
Power adapter
(DC IN 12V terminal) |
4-pin XLR plug (female connector), 11.5 V to 20 V DC, 10 A (acceptable maximum load current) |
Using a Battery
The battery adapter for V-mount batteries comes attached to the camera. If it was removed, attach the battery adapter in advance.
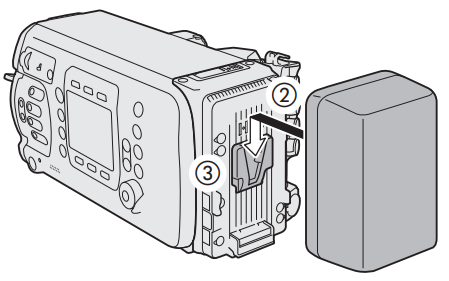
Attaching a Battery
- Make sure the camera is turned off.
- Align the V-shaped wedge on the battery to the V-mount on the battery plate.
- Gently press the battery down until it clicks in place.
|
 |
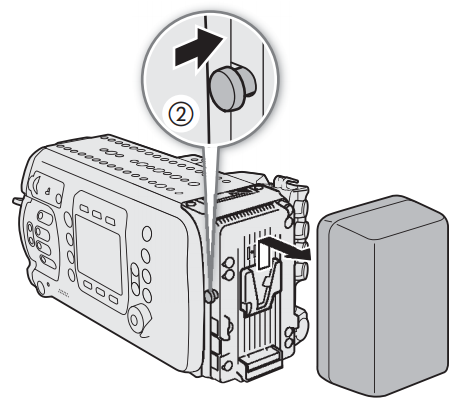
Removing a Battery
- Press the
 button to turn off the camera. button to turn off the camera.
- While holding the battery release latch pressed down, slide the battery up and remove it.
|
 |
Using the DC IN 12V Terminal
- Press the button to turn off the camera.
- Connnect the 4-pin XLR connector of the external power supply to the camera's DC IN 12V terminal.
|
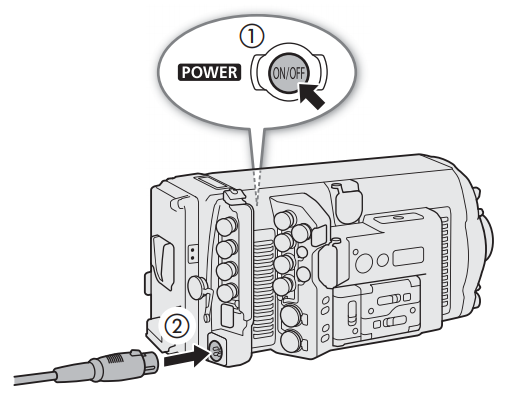 |
 IMPORTANT IMPORTANT
- Make sure to turn off the camera before connecting or disconnecting an external power Source to/from the camera's DC IN 12V terminal.
|
Checking the Camera's Power Levels
You can check the voltage level of the power source used on the camera's HOME screen, the shooting screen that appears on monitoring devices and the

You can use the

settings to set a critical power level independently for the DC IN 12V terminal and battery. When the power input to the camera reaches the predetermined level, the onscreen power indicator will change to red and a message will appear in the

[LIVE] screen. When using a battery compatible with BMS (battery management system), you can even set the warning level as a percentage of the remaining battery charge instead of voltage.
* This screen shows only the voltage of the CDX-36150 Recorder's power supply (DC IN or battery).

NOTES
- If the power supplied to the camera is at or below the level set for the power level warning, the camera will not start recording.
Power Outputs
The camera features three power outputs for accessories: the DC OUT 24V 2A terminal, the DC OUT 12V 2A terminal and the D-TAP terminal on the battery adapter.
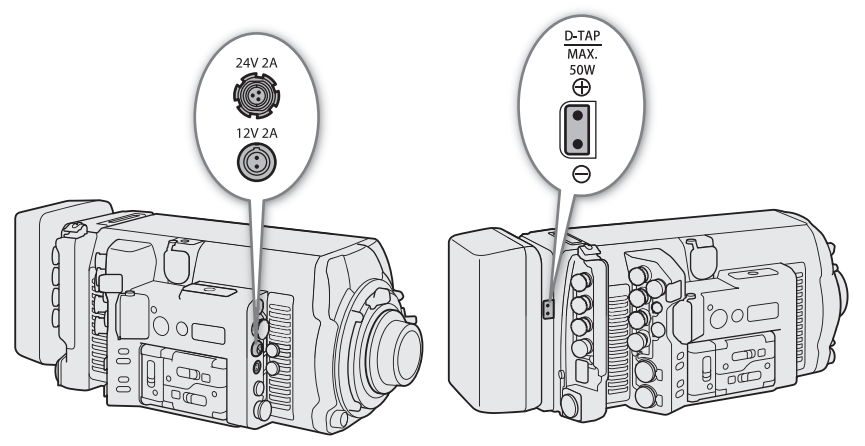
| Power output |
Specifications* |
| DC OUT 24V 2A terminal |
Fischer 3-pin connector, 24 V DC, 2.0 A (max.) |
| DC OUT 12V 2A terminal |
LEMO 2-pin connector, 12 V DC, 2.0 A (max.) |
| D-TAP terminal |
D-Tap connector, 50 W (max.) |
* Actual levels may vary depending on the power source supplying the camera.
IMPORTANT
- Be sure to use the camera's power outputs within the specifications given.
- When supplying power to external accessories, be careful of the polarity of the power connections.
Connecting the power supply incorrectly can cause malfunctions.
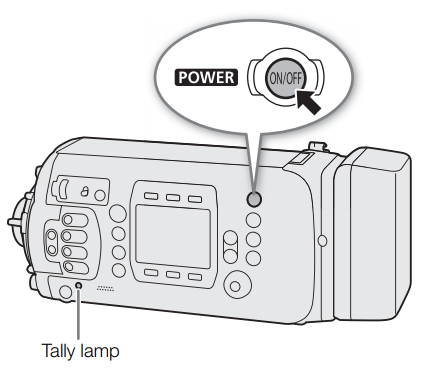
Turning the Camera On and Off
After connecting an appropriate power source to the camera, press the button to turn on the camera. While the camera is starting up, the tally lamp will illuminate in red. When the camera is ready to start recording, the tally lamp will change to green and the HOME screen will be displayed on the camera's control display.
To turn off the camera, press and hold the button. After the countdown that appears on the control display ends, the camera will start the shutting down process and will turn off after a few seconds. |
 |
