Adding the printer with a USB Connection on a Mac
After installing the printer driver, you need to specify the printer you want to use in the [System Preferences] in order to print a document.
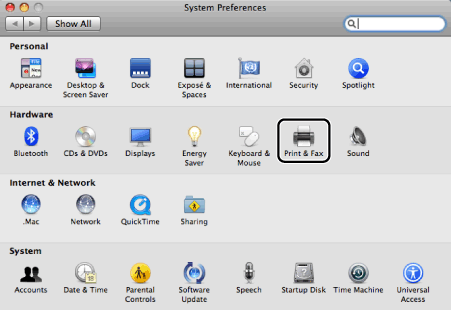
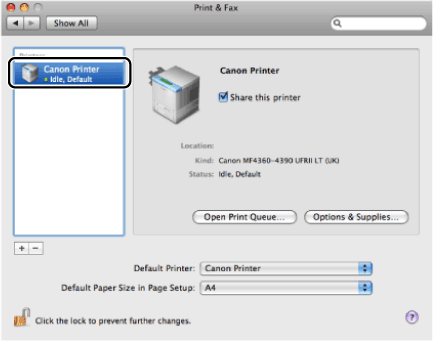
1. Open [System Preferences] -> click [Print & Fax].
2. Turn the printer on -> connect the printer to a computer with a USB cable.
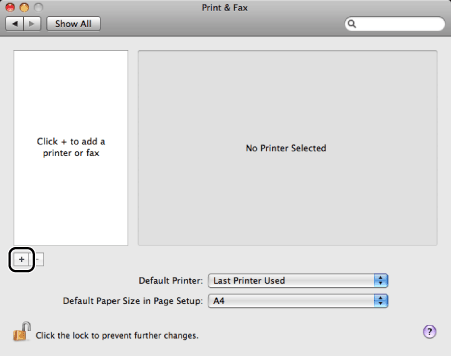
3. Click the [+] icon.
If you are using Mac OS X 10.4.x, click [Printing] in the [Print & Fax] dialog box to display the [Printing] pane -> click the [+] icon.
The printer registration dialog box is displayed.
4. Click [Default] or [Default Browser].
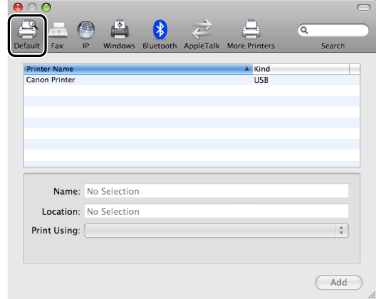
5. Select the printer you are going to use.
Note:
Select a printer that has [USB] displayed in the [Kind] or [Connection] column.
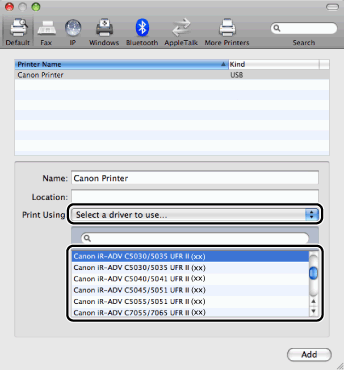
6. Select [Select a driver to use] from [Print Using] -> select the printer driver corresponding to the printer you are going to use from the list.
If you are using Mac OS X 10.4.x, select [Canon] from [Print Using] -> select the printer driver corresponding to the printer model you are going to use.
If you are using Mac OS X 10.6.x, select the printer driver corresponding to the printer you are going to use from the list.
7. Click [Add].
8. Confirm that the printer has been added in the [Printing] pane of the [Print & Fax] dialog box -> close the [Print & Fax] dialog box.
Note:
- Confirm that the driver name corresponding to your printer is displayed beside [Kind] on the right-hand side of the [Print & Fax] dialog box.
