|
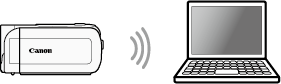
With the Remote Browse function, you can use the Web browser on any device equipped with a Wi-Fi receiver (iOS/Android devices, computers, etc.) to access the camcorder. You can then play back your recordings using the Web browser and even save local copies of them on your device.
NOTE
- The example procedurefor viewing videos and photos taken with the camcorder below is shown in Windows 7 using Internet Explorer 9.
- The screens displayed and setting procedures may differ depending on your operating system and web browser.
- Depending on the device, OS, browser and video quality, you may not be able to play back or save recordings.
- A computer equipped with a Wi-Fi function is required to use the Playback via Browser feature.
The procedure for using the Playback via Browser feature to view recordings on a computer is explained below.
1. Turn the camcorder on.
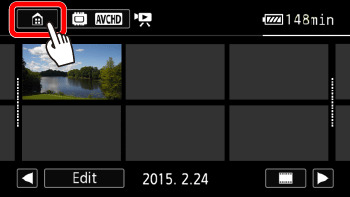
2. Press the [  ] button to set the camcorder to <Playback> mode.
3. Touch [  ].
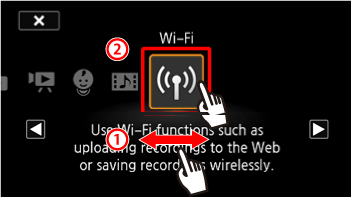
4.  Drag your finger left/right to bring the [Wi-Fi] menu to the center, and then  touch the icon to open it.
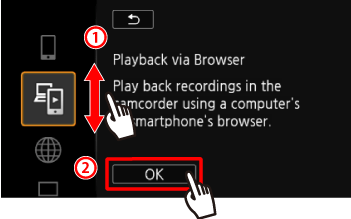
5. Drag your finger up/down to bring [Playback via Browser] to the center, and then touch [OK].
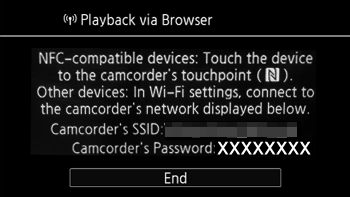
- The camcorders SSID (network name) and password will appear.
- The camcorder will be ready to connect with the computer.
6. Computer: In the Wi-Fi settings screen, turn on Wi-Fi.
NOTE
For more information about the computers Wi-Fi connection method, please refer to the instruction manual for the computer or the relevant operating system.
7. Computer: Perform a search for available Wi-Fi networks, and select the SSID that was displayed on the camcorders screen in step 4.
8. Computer: Enter the password that appears on the camcorders screen.
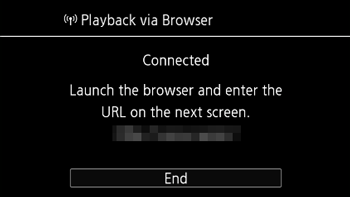
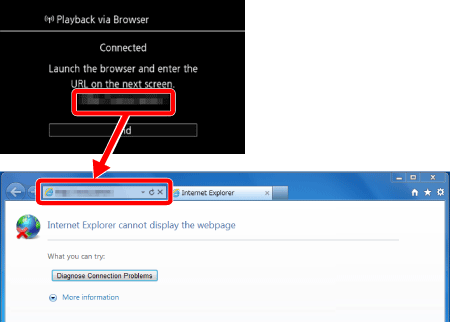
- When the Wi-Fi connection is correctly established, [Connected] will appear on the camcorder's screen.
NOTE
As long as you do not reset the camcorders Wi-Fi password, you only need to enter the password the first time you connect the computer.
9. Computer: Start the Web browser.
10. Computer: enter the URL that appears on the camcorders screen into the Web browsers address bar.
NOTE
The URL is always the same so you may find it convenient to bookmark the URL.
11. Computer: Click the [  ] icon displayed on the top left of the screen.
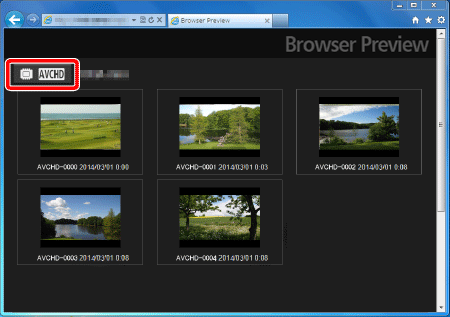
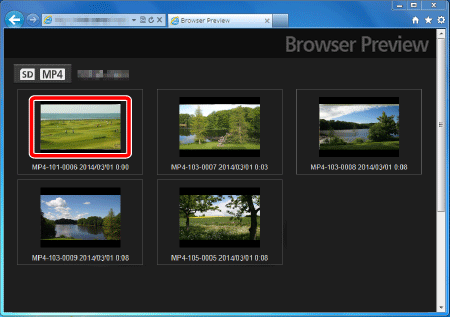
12. Computer: Click [  ], [  ], or [  ] for the desired memory.
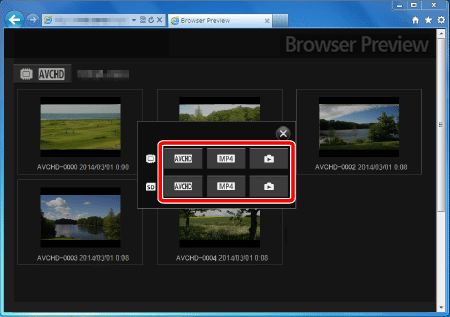
13. Computer: Click the desired recording from the list.
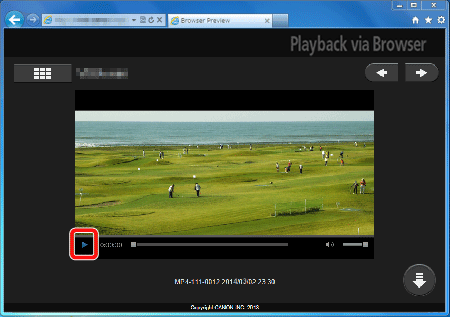
14. Computer: Click [  ].
- For movies, the selected recording will start playing back.
- For photos, the photo will be displayed.
NOTE
- AVCHD movies cannot be played back.
- Click [
 ] to return to the list of recordings. ] to return to the list of recordings.
- To save movies or photos to the computer, click [
 ]. ].
15. When you have finished:
Camcorder: Touch [End] > [OK] to end the wireless connection and turn off the camcorder.
REFERENCE
- The following types of MP4 scenes will be recognized as multiple files on other devices.
- Scenes exceeding 4 GB
- Scenes recorded at 35 Mbps exceeding 30 minutes
- Scenes recorded at a video quality other than 35 Mbps exceeding 1 hour
|
