
Printing onto Custom Size Paper or Envelope
| Article ID: ART100419 | | | Date published: 05/11/2015 | | | Date last updated: 02/02/2024 |
Description
Printing onto Custom Size Paper or Envelope
Solution
| Printing onto Custom Size Paper or Envelope
ID : 8202241900 _ EN _ 1
|
|
| Solution |
This section describes how to print onto custom size paper or envelopes.
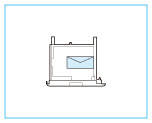
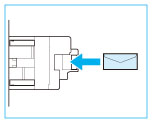
Loading Envelopes Envelopes can be loaded into Paper Drawer 1 and the multi-purpose tray. Make sure to flatten any curls on envelopes before loading them. Also pay attention to the orientation of envelopes and which side is face up.
 Before Loading Envelopes Before Loading Envelopes
Follow the procedure below to prepare the envelopes before loading.
1. Close the flap of each envelope.
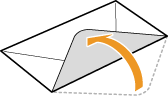
2. Flatten them to release any remaining air, and make sure that the edges are pressed tightly.
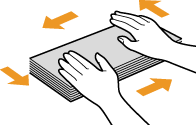
3. Loosen any stiff corners of the envelopes and flatten any curls.

4. Align the edges of the envelope on a flat surface.

Loading Envelopes in the Paper Drawer
Attach the Envelope Feeder Attachment before loading envelopes to a paper drawer.
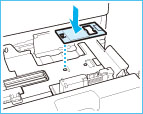
1. Open the paper drawer 1, and remove the envelope feeder attachment.
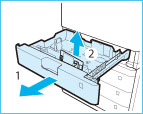
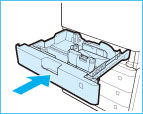
1-1. Grip the handle, and pull out the paper drawer until it stops.
1-2. Remove the envelope feeder attachment stored inside the paper drawer.
2. Attach the envelope feeder attachment by aligning the protruding areas of the envelope feeder attachment with the holes on the paper drawer.

3. Adjust the position of the paper guides.
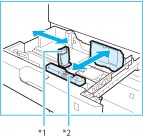 *1 Paper Guide on Left
*2 Paper Guide at Front
3-1. Slide the paper guide on the left while squeezing it on the top to align it with the mark for the desired paper size.
3-2. Slide the paper guide at the front while squeezing it on the top to align it with the mark for the desired paper size.
Slide the paper guide until they click into place. If the paper guides are not aligned correctly, the paper size will not correctly appear on the display. It is also necessary to adjust the paper guide correctly to avoid causing a paper jam, dirty prints, or making the inside of the machine dirty.
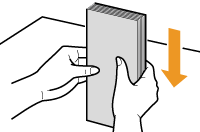
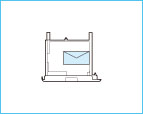
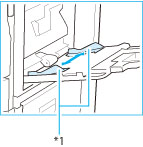
4. Load the envelopes into the drawer.

4-1. Load 10 envelopes at a time with the side you want to print on facing up.
4-2. While loading the envelopes, press down on the right side of the receptacle to lock them into place.
Align the leading edges of the envelopes, and make sure that they are held in place under the claws. Make sure that the flaps are positioned as shown in the illustrations below.
 Monarch, COM10 No.10, DL, ISO-C5
 Yougatanaga 3
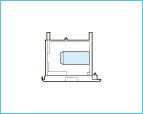 Nagagata 3
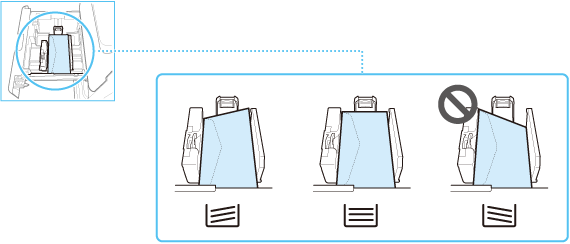
If envelopes are oriented normally when loaded but wrinkle when printed, load envelopes after rotating them 180 degrees, as shown below.
 Monarch, COM10 No.10, DL, ISO-C5
 Yougatanaga 3
5. Gently push the paper drawer back into the machine.
6. Register the type of envelope on the <Paper Settings> screen.
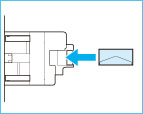
Loading Envelopes in the Multi-Purpose Tray
If you want to load the envelopes into the multi-purpose tray, follow the procedure described below to prevent the envelopes from becoming creased.
1. Open the multi-purpose tray.
If you are loading large size envelopes, pull out the tray extension.
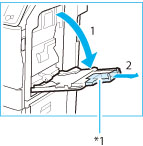 *1 Tray extension
If a paper size other than envelopes is specified for the multi-purpose tray, set <Register Default Settings> to <Off>.
2. Load the envelopes into the multi-purpose tray.
Load them as shown in the figures below.
 COM10 No.10 Monarch DL ISO-C5
 Nagagata 3
Yougatanaga 3
Do not exceed the load limit line when loading envelopes
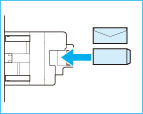
3. Adjust the paper guides.
 *1 Paper guides
Align the paper guides securely against the edges of the envelopes
If envelopes are oriented normally when loaded but wrinkle when printed, load envelopes after rotating them 180 degrees, as shown below.
 Monarch, COM10 No.10, DL, ISO-C5
 Yougatanaga 3
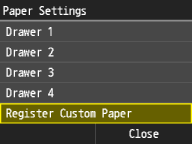
Registering a Custom Paper Size You can register up to three frequently used custom paper sizes.
1. Tap <Paper Settings>.

2. Tap <Register Custom Paper>.
3. Tap <Not Registered>.
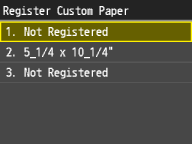
3-A. Changing a setting
3-A-1. Tap the registered size you want to change.
3-A-2. Tap <Edit> and proceed to step 4.
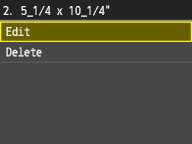
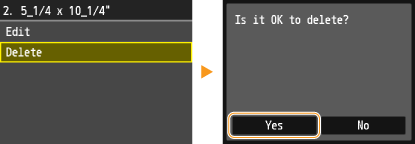
3-B. Deleting a setting
3-B-1. Tap the registered size you want to delete.
3-B-2. Tap <Delete>.
3-B-3. Tap <Yes>.
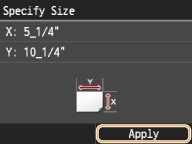
4. Specify the paper size.
4-1. Specify the length of the <X> (shorter) side.
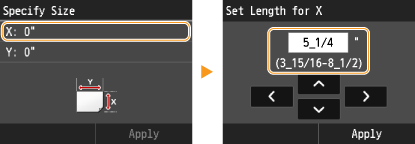 4-2. Specify the length of the <Y> (longer) side.
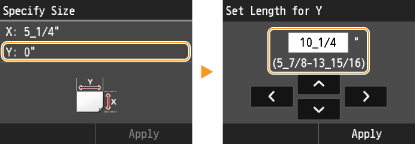 4-3. Tap <Apply>.
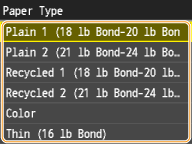
5. Tap the paper type.
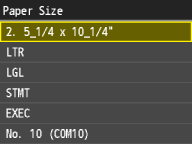
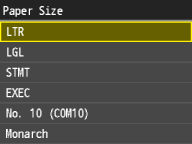
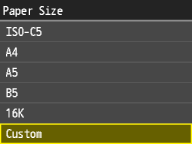
Selecting a Registered Custom Paper SettingThe paper sizes that are registered in the procedure above are displayed on the screen for selecting the paper size.
 When selecting the paper size for the paper drawer When selecting the paper size for the paper drawerOn the screen to specify the size of the paper that is loaded in the paper drawers, the registered paper sizes are displayed.
 When selecting the paper size for the multi-purpose tray When selecting the paper size for the multi-purpose trayWhen paper is loaded in the multi-purpose tray, the screen for selecting the paper size for the multi-purpose tray is displayed. The registered paper sizes are displayed on this screen.
  The registered paper sizes are displayed when you set the default paper settings for the multi-purpose tray. From the screen, you can select one of the displayed sizes as the default paper size for the multi-purpose tray.
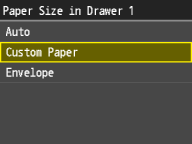
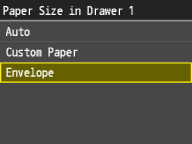
Specifying the Paper Type in the Paper Drawer
Use the following steps when loading paper other than plain paper such as heavy paper or envelopes in the drawer.
1. Tap <Paper Settings>.
2. Tap <Drawer 1>, <Drawer 2>, <Drawer 3> or <Drawer 4>.

3. Tap <Custom Paper> or <Envelope>.
3-A. Loading Custom Paper
3-A-1. Tap <Custom Paper>.
 3-A-2. Tap a registered custom paper size.
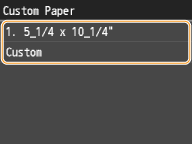 You must first register a custom paper size.
3-B. If you set Envelope the Drawer 1
3-B-1. Tap <Envelope>.
 3-B-2. Tap envelope type.
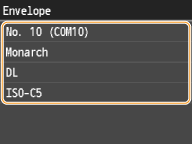 <Envelope> is selectable as a paper size only when <Drawer 1> is selected.
4. Tap the paper type.
Specifying Paper Size and Type in the Multi-Purpose Tray The screen shown here is displayed when paper is loaded in the multi-purpose tray. Follow the on-screen instructions to specify settings that match the size and type of the loaded paper.
1. Tap the paper size.
 When loading custom size paper When loading custom size paper1-1. Tap <Custom>.
 1-2. Specify the length of the <X> (shorter) side.
1-3. Specify the length of the <Y> (longer) side.
1-4. Tap <Apply>.
2. Tap the paper type.
|
| Related Info | Loading Paper in the Multi-Purpose Tray Specifying Paper Size and Type Paper Handling Paper Feeding and Paper Output |
 ).
). ).
). ).
). /
/ , or numeric keys for inputting whole numbers and fractions, and tap <Apply>.
SIMS Doc Id
8202241900