To import recorded videos to a computer, it is necessary to install the PIXELA ImageMixer 3 SE software provided.
In addition to importing videos to a computer, PIXELA ImageMixer 3 SE can be used to create original DVD's by adding music and titles to videos, and to write those movies back to the camcorder to play them back.
Verify the system requirements:
System requirements vary depending on the task you want to perform, such as saving files, playing them back, editing them, and writing them back to the camcorder. Confirm the following table for the relevant operations.
| Possible operations |
Contents |
System Configuration A
|
System Configuration B
|
| Save your movies to the computer and easily organize them |
Transfer the movies you recorded from the camcorder to the computer. On the computer you can organize and quickly search your video library, rate your favorite videos and use the albums created automatically (by recording date) or create albums of your own. |
Yes
|
Yes
|
| Play back your video files from the computer |
After transferring your movies from the camcorder, play them back directly from the computer. |
No
|
Yes
|
| Edit your movies |
Trim out your movies to keep only the most interesting scenes. Rearrange them as you wish and add transition effects, subtitles or background music to your preference. |
No
|
Yes
|
| Create discs from your movies |
Create backup discs from your video files. Create AVCHD discs to keep them in HD quality or DVD-Video discs that you can share with friends and family. Of course, you can create original menus for your discs. |
Yes
|
Yes
|
| Write your movies back to the camcorder |
Transfer your movies from the computer back to the camcorder, even after editing them to your liking. |
Yes
|
Yes
|
|
System configuration A
|
|
System configuration B
|
| OS |
Microsoft Windows XP* |
Microsoft Windows Vista** |
OS |
Microsoft Windows XP* |
Microsoft Windows Vista** |
| CPU |
Intel Pentium 4, 1.49 GHz
Intel Celeron, 1.7 GHz |
Intel Pentium 4, 2.4 GHz
Intel Celeron D, 3.0 GHz |
CPU |
Intel Pentium D, 3.0 GHz
Intel Core 2 Duo, 2.13 GHz |
| RAM |
512MB |
RAM |
1GB |
2GB |
| Available Hard Disk Space |
Installation: 300 MB;
Disc authoring: At least double the amount of data to be written on the disc |
Available Hard Disk Space |
Installation: 300 MB;
Disc authoring: At least double the amount of data to be written on the disc |
| Display |
1024 x 768 resolution, 16-bit color (high color) |
Display |
1280 x 1024 resolution, 32-bit color;
Intel G965 Express Chipset on-board |
| Sound |
Sound card compatible with DirectSound |
Sound |
Sound card compatible with DirectSound |
| DVD Drive |
Preinstalled DVD drive with writing capabilities |
DVD Drive |
Preinstalled DVD drive with writing capabilities |
| Others |
- Preinstalled USB 2.0 (Hi-Speed USB) port
- System that can run DirectX 9.0c
- Internet connection (during installation) |
Others |
- Preinstalled USB 2.0 (Hi-Speed USB) port
- System that can run DirectX 9.0c
- Apple QuickTime 7.1 or better installed and running
- Internet connection (during installation) |
*Microsoft Windows XP (Home Edition or Professional Edition), Service Pack 2. **Microsoft Windows Vista (Home Basic, Home Premium, Ultimate, Business, or Enterprise Edition, 32 bit). Install PIXELA ImageMixer 3 SE
1. Verify that the computer is connected to the Internet.
- During the installation, the software will be activated online. If you have an Internet connection make sure that the computer is connected to the Internet during the installation process.
2. Insert the PIXELA ImageMixer 3 SE Ver. 1.0 CD-ROM into the computer's CD or DVD drive.
- The [InstallShield Wizard] will start automatically
- Windows Vista users: Select [Continue] in the User Account Control window that opens.
- The [InstallShield Wizard] will start automatically
- Windows Vista users: Select [Continue] in the User Account Control window that opens.
3. Please start the installation by following the instructions in the [InstallShield Wizard].
- Restart the computer after installation is completed.
How to Import Recorded Videos to a Computer
1. Power the camcorder using the compact power adapter.
2. Set the <mode dial> to <  > and turn on the camcorder.
3. Connect the camcorder to the computer with the USB cable to start ImageMixer 3.
- If the device type selection screen appears, select [PC/PRINTER] and press <  > .
> .
4. Click [Save Files to PC] on the [ImageMixer 3 Launcher] menu.
5. Select the videos to be saved.
Click [  select difference ] or [
  select all ] or select individual videos you wish to save.
[ select difference ]: Selects videos that have never been imported to a computer
-Among the video files stored in the camcorder, the [  imported mark ] is displayed for those that have been imported to a computer.
[ select all ]: Selects all videos that are displayed.
Select individual videos : Select the video files to be saved
6. Click [Save].
Imported videos will be stored in the [My Library] folder in [My Videos] (or [My Documents] if [My Videos] does not exist). To change the destination, specify the destination in [Preferences] in the [Settings] menu.
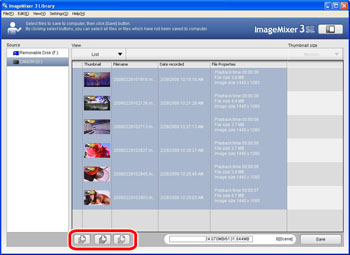
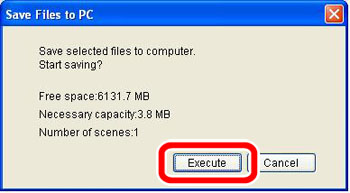
7. When you click [Execute], saving will start. Saved videos are added to the ImageMixer 3 Library automatically and Albums are created by date in the [Source pane*].
*Source pane: the location where video files are stored.