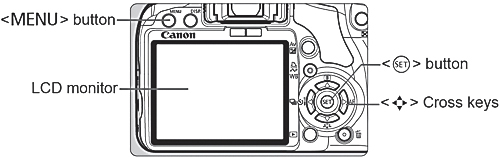
By setting various optional settings with the menus, you can set the image recording quality, date/time, etc. While looking at the LCD monitor, you use the <MENU> button, < > cross keys, and <SET> button on the camera back.
|
|
|
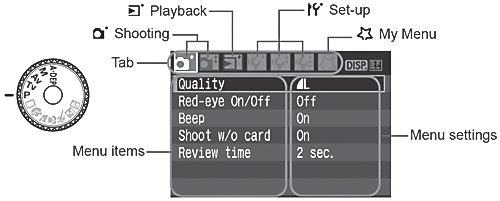
BASIC ZONE MODE MENU SCREEN

The [ ] tabs are not displayed in the Full Auto and Basic Zone modes. When a Basic Zone mode is set, there are menu items which are not displayed. ] tabs are not displayed in the Full Auto and Basic Zone modes. When a Basic Zone mode is set, there are menu items which are not displayed.
|
|
CREATIVE ZONE MODE MENU SCREEN
|
MENU SETTING PROCEDURES
|
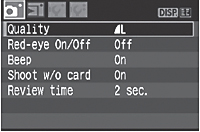
Display the menu.
- Press the <MENU> button to display the menu.
Select a tab.
- Press the <
 > key to select a menu tab. > key to select a menu tab.
- You can also turn the <
 > dial to select a tab. > dial to select a tab.
3 Select a menu item.
- Press the <
 > key to select the menu item, then press <SET>. > key to select the menu item, then press <SET>.
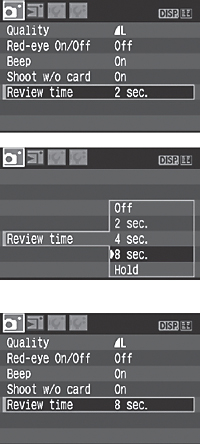
Select the setting.
- Press the <> or <> key to select the setting. (Some settings require you to press either the <> or <> key to select it.)
- Some menus will indicate the current setting in blue.
Set the desired setting.
Exit the menu.
- Press the <MENU> button to return to the shooting settings display.
|
The explanation of menu functions hereinafter assumes that you have pressed the <MENU> button to display the menu screen.
