
Making Copies MP240
| Article ID: ART102025 | | | Date published: 05/11/2015 | | | Date last updated: 08/15/2015 |
Description
Solution
Copying Documents
This section describes the basic operation to copy documents.
For the operation, see the notes and operation procedure described in the reference page.
 Important: While you are able to change the paper size and type as well as the speed to adjust the print quality, you cannot adjust the density or contrast from the operation panel. For more detailed image input adjustments, it is recommended to scan the original to your computer and then print it.
You need to prepare:
Originals to copy. See Originals You Can Load.

Paper for printing.

-
Prepare for copying.
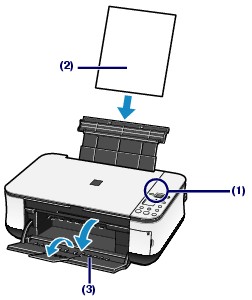
(1) Turn on the power.
(2) Load paper.
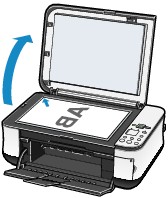
(3) Open the Paper Output Tray gently, and open the Output Tray Extension.(4) Load an original on the Platen Glass.
Load the original with the side to copy facing down and align it with the alignment mark as shown below.
-
Start copying.
(1) Press the [+] button repeatedly to specify the number of copies (max. 20 copies).
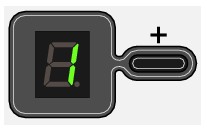
To make 1 to 9 copies or 20 copiesDisplay the desired number of copies on the LED.Each time you press the [+] button, the number on the LED increases by one. When F appears, the number of copies is set to "20". Press the [+] button again to return to "1".To make 10 to 19 copies(1) Display F on the LED.(2) Load only the desired number of sheets to copy in the Rear Tray.(2) Press the Paper button repeatedly to specify the page size and media type.
The Paper lamp indicates the selected page size and media type.
A4 or 8.5" x 11" Plain Paper / A4 or 8.5" x 11" Photo Paper / 4" x 6" Photo Paper
|
(3) Press the Color button for color copying, or the Black button for black & white copying.
The machine starts copying.
While copying is in progress, the number on the LED is flashing and reduced by one to indicate the remaining number of copies to be made.To make 10 to 19 copiesThe paper-out error will occur ("E, 2" appears on the LED) when all of the loaded paper has been used to print. Press the Stop/Reset button to release the error.
|
|
|
|
 Switching the Page Size between A4 or 8.5" x 11" (Letter)
You can switch the size of paper loaded in the Rear Tray between A4 and 8.5" x 11" (Letter).
This setting is useful if you usually load Letter-sized paper in the Rear Tray regardless of the page size indication "A4" on the Operation Panel, and vice versa.
-
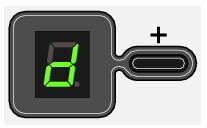
Press the
 (Maintenance) button repeatedly until d appears.
-
Press the Black button to select A4, or the Color button to select 8.5" x 11" (Letter).
|
Fit-to-Page Copying
The Fit-to-Page copy function enables you to copy originals automatically enlarged or reduced to fit the selected page size.
-
Prepare for copying.
-
Press the [+] button repeatedly to specify the number of copies.
-
Press the Paper button repeatedly to select the page size and media type.
|
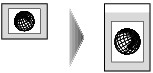
When the photo paper is selected for the media type, the original is copied without borders and fills the entire page. |
-
Press the Fit to Page button.
The Fit to Page lamp lights up and the Fit-to-Page copy function is enabled. The original is copied in the size automatically enlarged or reduced to fit the selected page size.
|
-
Press the Color button for color copying, or the Black button for black & white copying.
The machine starts Fit-to-Page copying.
|
|
Loading Originals to Copy or Scan
Originals You Can Load
You can copy or scan the following originals.
|
Types of originals: |
Photos or Texts (documents, books, magazines, etc.) |
|
Size (W x L): |
Max. 8.5 x 11.7 inches / 216 x 297 mm |