Loading envelopes in the MP240
| Article ID: ART102026 |
| |
Date published: 05/11/2015 |
| |
Date last updated: 08/15/2015 |
Description
Loading envelopes - MP240
Solution
Loading Envelopes:
-
Prepare envelopes.
- Press down on all four corners and edges of the envelopes to flatten them.
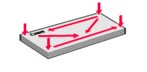
- If the envelopes are curled, hold the opposite corners and gently twist them in the opposite direction.

- If the corner of the envelope flap is folded, flatten it.
- Use a pen to press the leading edge in the inserting direction flat and sharpen the crease.

The figures above show a side view of the leading edge of the envelope.
-
Load envelopes.
* Figure 4
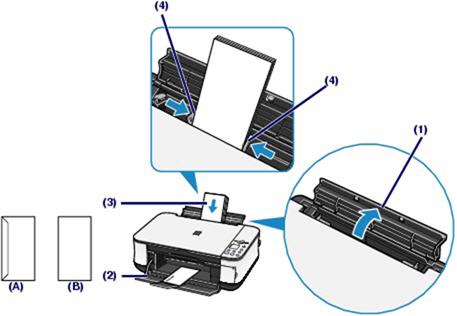
(A) Rear side
(B) Address side
-
Open the Paper Support. (See (1) in Figure 4 above.)
-
Open the Paper Output Tray gently, and open the Output Tray Extension. (See (2) in Figure 4 above.)
-
Slide the Paper Guides to open them, and load the envelopes in the center of the Rear Tray with the address side facing you. (See (3) in Figure 4 above.)
The folded flap of the envelope will be faced down on the left side.
Up to 10 envelopes can be loaded at once.
-
Slide the Paper Guides to align them with sides of the envelopes. (See (4) in Figure 4 above.)
Do not slide the Paper Guides too hard. The envelopes may not be fed properly.
-
Specify the settings in the printer driver.
-
Select Envelope in Media Type.
-
Select the size for envelopes.

Select DL Env. or Comm. Env. #10 in Page Size.

Select DL Envelope or #10 Envelope in Paper Size.
-
Select Landscape in Orientation.
Caution: If you do not specify Page Size (or Paper Size) or Orientation properly, the address will be printed upside down or will be turned to 90 degrees.
Note:
* The machine may make operating noise when feeding envelopes.
* In Windows, if the print result is upside down, select Rotate 180 degrees on the Page Setup tab in the Printer Properties dialog box of the printer driver.
