Paper you can use
-
Glossy Photo Paper, Photo Paper Glossy , Photo Paper Plus Semi-Gloss , Photo Paper Pro Platinum, Photo Paper Plus Glossy II, Photo Paper Pro II, Matte Photo Paper MP-101 .
-
Plain paper can be used but is not recommended.
-
When 'Borderless Printing' is selected, High Resolution Paper, T-Shirt Transfers, Transparencies, and Envelope cannot be selected in Media Type.
Document settings in the application
Applications where margins can be specified:
Applications where margins cannot be specified:
-
Confirm that the printer is connected to the computer and the printer is powered on.
-
In the Print window of the application software, select 'Properties'. (The Printing Preferences window is displayed.)
Note: Refer to the manual of the application software to see how the Print window is displayed. Depending on the application software, Properties may be displayed as Preferences.
-
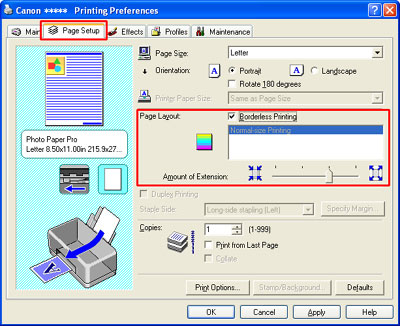
Click the Page Setup tab.
-
Select Borderless Printing.
*Display varies depending on the printer model.
-
The confirming message is displayed. Check the content of the message and click 'OK'.
Note: If selecting paper that is not recommended, the message advising to select a different media type will be displayed. Select an applicable media type and click 'OK'.
-
Adjust Amount of Extension.
-
When the setting is completed, click 'OK'.
-
When the Print window of the application software is displayed, perform printing.
Adjust the Amount of Extension
When you select borderless printing, the image is enlarged to a size slightly larger than the paper size, and the area that extends over the paper is not printed. Move the slider to adjust the extension amount.
- Moving the slider to the left will reduce the extension amount.
- The image is printed full size when the extension slider is fully to the left.
- You can see whether a margin is left on the paper by clicking 'Preview' and looking at the results on in the preview dialog box.
- When printing photographs, and when the extension slider is fully to the left, a white border might appear on some types of paper. Move the slider to the right to rectify this.
Adjusting Amount of Extension is completed.
Click to return to step 6 above
Borderless Printing Reference
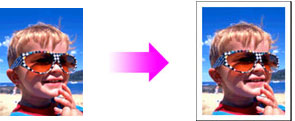
In borderless printing, an image will be slightly enlarged. Thus, the edges of the image will not be printed since they are extended off the paper.
Normal printing
Original image Result
Borderless printing
Original image Enlarged Result
(The tinted part will not be printed.)
The amount of an image extended off the paper (see the "A" in the diagram below) is called the amount of extension, which can be adjusted using the slide bar.
By dragging the slide bar to the left, you can reduce the amount of extension; however, if you reduce it too much, you may see "borders" on the result.
On the other hand, by dragging the slide bar to the right, you can enlarge the amount of extension.
A test print is recommended.
