|
|
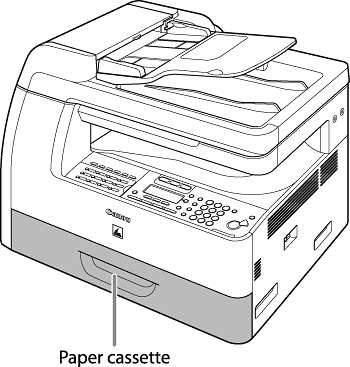
Specify the correct paper size for the paper cassette. (MF6595cx/MF6595/MF6590 Only)
| Article ID: ART102564 |
| |
Date published: 05/11/2015 |
| |
Date last updated: 08/15/2015 |
Solution
Specify the correct paper size for the paper cassette.
For the Paper Cassette
The default settings are <PLAIN PAPER> and <LTR>. When you place other types and/or sizes of paper, follow this procedure to change the settings.
1. Press [Additional Functions].
2. Press [<-] or [+>] to select <COMMON SETTINGS>, then press [OK].
3. Press [<-] or [+>] to select <SELECT PAPER TYPE>, then press [OK].

4. Press [<-] or [+>] to select <CASSETTE 1> or <CASSETTE 2>*, then press [OK].
* The paper cassette 2 is optional for MF6595 and standard for MF6595cx.
5. Press [<-] or [+>] to select the paper type, then press [OK].
<PLAIN PAPER>, <COLOR>, <RECYCLED>, <HEAVY PAPER 1>, <BOND>, <3HOLE PUNCH PAPER>
If you use the paper cassette 2*, press [<-] or [+>] to select <CASSETTE 2>* and repeat this step to set the paper type for <CASSETTE 2>*.
* The paper cassette 2 is optional for MF6595 and standard for MF6595cx.
6. Press [<-] or [+>] to select <REG. PAPER SIZE>, then press [OK].
7. Press [<-] or [+>] to select <CASSETTE 1> or <CASSETTE 2>*, then press [OK].
* The paper cassette 2 is optional for MF6595 and standard for MF6595cx.
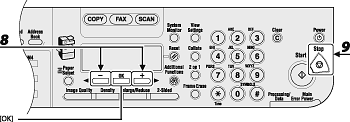
8. Press [<-] or [+>] to select the paper size, then press [OK].
<LTR>, <LGL>, <OFICIO>, <FLSP>, <BRAZIL-OFICIO>, <MEXICOOFICIO>, <A4>
If you use the paper cassette 2*, press [<-] or [+>] to select <CASSETTE 2> and repeat this step to set the paper size for <CASSETTE 2>.
* The paper cassette 2 is optional for MF6595 and standard for MF6595cx.
9. Press [Stop] to return to the standby mode.
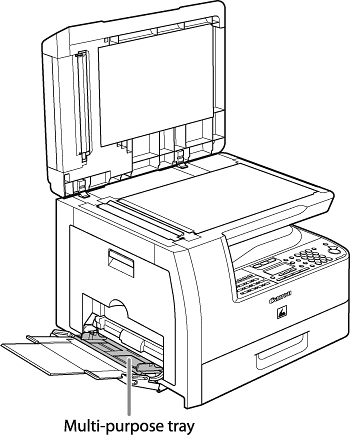
For the Multi-Purpose Tray
If you use same kind of paper for the multi-purpose tray, you can specify the paper size and type.
 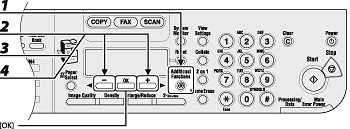
1 Press [Additional Functions].
2 Press [<-] or [+>] to select <COMMON SETTINGS>, then press [OK].
3 Press [<-] or [+>] to select <MP TRAY STD SET>, then press [OK].
4 Press [<-] or [+>] to select <ON>, then press [OK].

5 Press [<-] or [+>] to select <PAPER SIZE>, then press [OK].
6 Press [<-] or [+>] to select the paper size, then press [OK].
<LTR>, <STMTR>, <EXECUTIV>, <OFICIO>, <BRAZIL-OFICIO>, <MEXICO-OFICIO>, <FOLIO>, <G-LTR>, <G-LGL>, <FLSP>, <COM10>*1, <MONARCH>*1, <DL>*1, <ISO-C5>*1, <ISO-B5>*1, <FREESIZE>*2, <A4>, <B5>, <A5R>, <LGL>
*1 For envelopes.
If you select this size, <ENVELOPE> is automatically selected for the paper type, and the display for selecting the paper type does not appear. Skip to step 9.
*2 For non-standard paper size.
If you select this size, enter the vertical size in <VERTICAL SIZE>, then press [OK].
Enter the horizontal size in <HORIZONTAL SIZE>, then press [OK].
7 Press [<-] or [+>] to select <SELECT PAPER TYPE>, then press [OK].

8 Press [<-] or [+>] to select the paper type, then press [OK].
<PLAIN PAPER>, <COLOR>, <RECYCLED>, <HEAVY PAPER 1>, <HEAVY PAPER 2>, <HEAVY PAPER 3>, <BOND>, <3HOLE PUNCH PAPER>, <TRANSPARENCY>, <LABELS>, <ENVELOPE>
9 Press [Stop] to return to the standby mode.
|
