Before Installation
- Do not connect the USB cable before installing the software. If you connect the USB cable before installing the software and the Found New Hardware Wizard screen appears, click [Cancel].
- For Windows 2000/XP/Server 2003/Vista, logon as Administrator to install the software.
- Make sure the machine is turned on before connecting the USB cable.
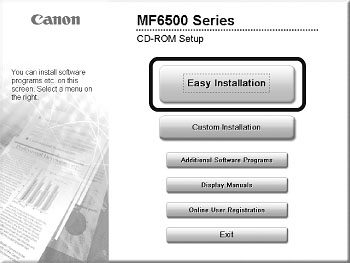
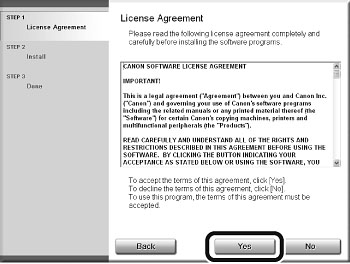
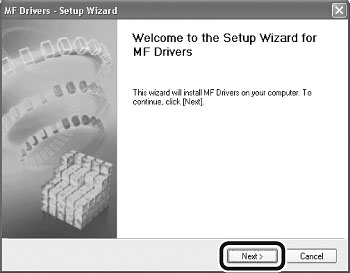
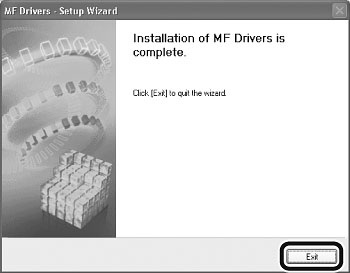
- On the screen shown at each step, click on the circled button to proceed.
- The machine does not come with a USB cable.
Installation Procedure
1

2
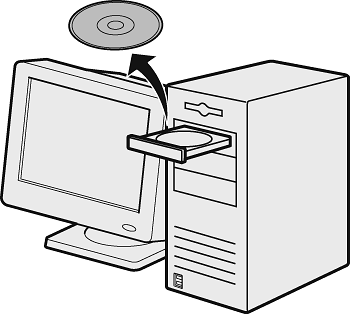
If the MF6500 Series CD-ROM Setup screen is not displayed, click [start] on the Windows task bar -> [My Computer].
- Windows Vista: click [start] on the Windows task bar -> [Computer].
- Windows 2000: double-click [My Computer] on the Windows desktop.
Open the CD-ROM icon, then doubleclick [MInst] ([MInst.exe]).
The [Additional Software Programs] button is not displayed on Windows 64-bit version.
3

4

note:
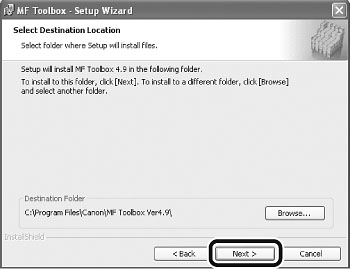
If the disk space is insufficient to install the software, an error message is displayed. Free the disk space, and then try again.
5
6
7
8

9
10

11

12


When you install Presto!, PageManager and ScanSoft OmniPage, follow the on-screen instructions.
13

14
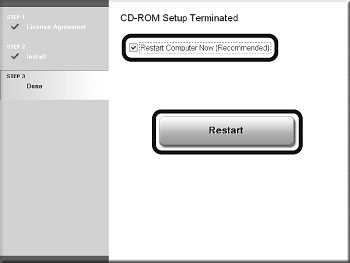
After checking [Restart Computer Now (Recommended)] box, you can restart your computer by clicking the [Restart] button.
15

(MF6595cx/MF6595/MF6590 only) Attach the ferrite core (A) as close as possible to the B-type side (square) of the USB cable (B).
16
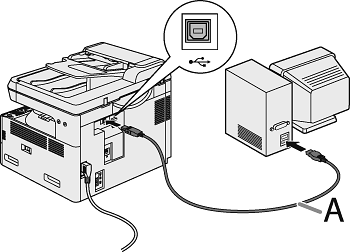
After restarting your computer, connect the machine and your computer with a USB cable (A).
note:
Depending on the operation system you use, the dialog box to inform you that new hardware is detected may appear. Follow the on-screen instruction to complete the installation.
17
You have now completed installation.
Checking the Installation
Check if the driver is installed successfully and if this machine has been set as default printer.
note:
If the name of your machine is selected on the [printer] screen from an application, it is set as default printer.
1 Open the [Printers and Faxes] folder (Windows 2000: the [Printers] dialog box).
- Windows XP/Server2003: Click [start] on the Windows task bar -> select [Printers and Faxes].
- Windows Vista: Click [start] on the Windows task bar -> select [Control Panel] -> [Hardware and Sound] -> double-click [Printer].
- Windows 2000: [Start] -> [Settings] -> [Control Panel] -> double-click [Printers].
Make sure the corresponding printer driver icon is displayed.
2 Set as default printer.
Click the printer icon of this machine. Click [Set as Default Printer] from the [File] menu.
3 Open the [Scanners and Cameras] folder (Windows 2000: the [Scanners and Cameras Properties] dialog box).
- Windows XP/Server2003: Click [start] on the Windows task bar -> select [Control Panel] -> [Printers and Other Hardware] -> [Scanners and Cameras].
- Windows Vista: Click [start] on the Windows task bar -> select [Control Panel] -> [Hardware and Sound] -> double-click [Scanners and Cameras].
- Windows 2000: [Start] -> [Settings] -> [Control Panel] -> double-click [Scanners and Cameras].
Make sure the corresponding scanner driver icon is displayed.
4 Check if there is the [Canon MF Toolbox 4.9] icon on the Windows desktop.
If the [Canon MF Toolbox 4.9] icon is displayed on the Windows desktop, installation of the MF Toolbox 4.9 has been successful.
