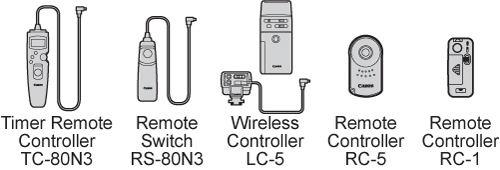
Remote Switch and Remote Controller
You can connect the Remote Switch RS-80N3 or Timer Remote Controller TC-80N3 ( sold separately) or any EOS accessory equipped with an N3-type terminal to the camera and shoot with it.
Note:
To operate the accessory, refer to its instruction manual.
Connecting the Remote Switch
1. Open the terminal cover.
2. Connect the plug to the remote control terminal.

Reference:
To disconnect the plug, grasp the plug's silver part and pull out.
Remote Control Shooting
With Remote Controller RC-1 or RC-5 ( sold separately), you can shoot remotely up to about 5 meters/16.4 feet from the camera. RC-1 enables you to shoot immediately or have a 2-sec. delay, and RC-5 has a 2-sec. delay.
1. Set the power switch to <ON>.
2. Focus the subject.
3. Set the lens focus mode switch to <MF>. You can also shoot with <AF>.

4. Press the <AF/DRIVE> button. Select the self-timer. Look at the LCD panel and turn the <Quick Control Dial> to select < > (10-sec. delay) or <
 > (2-sec. delay).
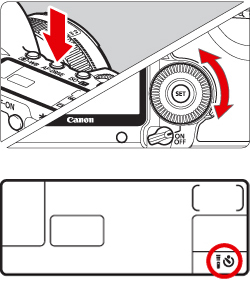
5. Point the remote controller toward the camera's remote control sensor and press the transmit button. The self-timer lamp lights and the picture is taken.

Attention:
Camera misoperation may occur near certain types of fluorescent lights. During wireless remote control, try to keep the camera away from fluorescent light.
