Switching between Light Metering Modes
 This function is only available in P, Tv, Av, and M modes. This function is only available in P, Tv, Av, and M modes. |
Evaluative metering is the default light metering mode. This can be switched to another metering mode.
|

|
Evaluative Light Metering
|
The camera divides images into several zones for light metering. The camera evaluates the complex lighting conditions, such as the position of the subject, the brightness, the background, the direct light, and the backlighting, and adjusts the settings to the correct exposure for the main subject.
This mode is particularly well-suited for backlight conditions and general photography.
|
|

|
Center-Weighted Averaging
|
Averages the exposure from the entire image, but places more weight on the subject at the center. |
|

|
Spot AE Point
|
Meters the area within the spot AE point frame. Can be set when there is only one AF frame |
|
Center
|
Locks the spot metering frame to the center of the LCD monitor. |
|
AF Point
|
Moves the spot AF point to the AF frame. |
* When the AF frame is set to Auto Selection, it will be fixed to the center.
* The LCD must be turned on to change the metering mode.
- Press the FUNC./SET button to select
 a metering mode and use the
  or
or  arrow to select a metering mode as follows.

The following options are available:

-
Once a metering mode is chosen, press the <FUNC./SET> button.
- The icon of the currently selected light metering mode appears on the display panel and LCD monitor.
Selecting [Spot AE] point to the AF Frame/Centering the Spot AE Point.
-
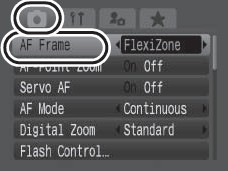
Press the <MENU> button and select [AF Frame] and use the or button to select [FlexiZone].
-
If you have selected  (Spot AE point), the above [FlexiZone] options allows you to position the frame from which metering settings will be calculated. If you have selected
  (Evaluative Light Metering) or
  (Center-Weighted Averaging), you are ready to shoot the image.
- In the [
 (Rec.)] menu, select [Spot AE Point].

- Select [Center] or [AF Point] using the or arrow, then press the <MENU> button.
When [Spot AE point] is set to [Center], the spot AE point frame appears at the center of the LCD monitor (or viewfinder), and when [Spot AE Point] is set to [AF point], it appears inside the selected AF frame.
