Preparing for Live View Shooting
|
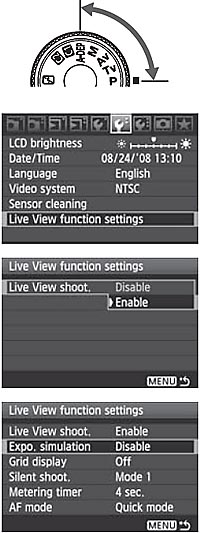
1 Set the shooting mode.
- Set the shooting mode to a Creative Zone mode.
- Live View shooting does not work in Basic Zone modes.
2 Select [Live View function settings].
- Under the [
 ] tab, select [Live View function settings], then press < ] tab, select [Live View function settings], then press < >. >.
3 Select [Live View shoot.].
- Turn the <
 > dial to select [Live View shoot.], then press <>. > dial to select [Live View shoot.], then press <>.
- Turn the <> dial to select [Enable], then press <0>.
4 Set any other functions.
- If necessary, set the following functions. Refer to the respective page for details.
• Exposure simulation
• Grid display
• Silent shooting
• Metering timer
• AF mode
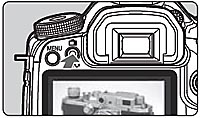
5 Display the Live View image.
- Press the <
 > button. > button.
- The Live View image will appear on the LCD monitor.
- Press the <> button again to turn off the LCD monitor and return to normal shooting.
|
About Exposure Simulation
Exposure simulation displays and simulates how the brightness of the actual image will look. The [Disable] and [Enable] settings are explained below:
Disable
The image is displayed at the standard brightness to make the Live View image easy to see.
Enable
The Live View image will closely reflect the brightness level of the actual image you capture. If you set exposure compensation, the image brightness will change accordingly.
During Live View shooting, do not point the camera toward the sun. The sun's heat can damage the camera's components.
