Loading and Printing on Rolls (iPF720) |
| These are the basic steps for loading and printing on rolls. |
| Follow the steps below to switch to a new roll or a roll of a different type or width before printing. |
| <Note> |
- Before printing banners or other long documents, spread a clean cloth or paper on the floor. Otherwise use the optional Output Stacker .
Otherwise, long sheets that touch the floor after printing may become dirty. |
| - If you prefer to wait for the ink to dry after printing and simply eject the document, you can deactivate automatic cutting and cut the paper manually. |
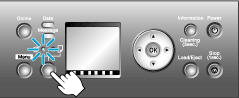
| 1. Turn the printer on. |
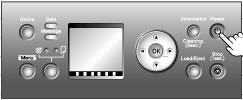 |
| 2. Select a roll as the paper source. |
 |
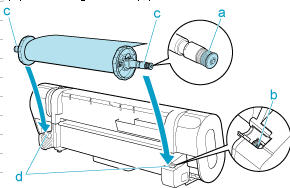
| 3. Lift the Holder Stopper lever (a) from the shaft side to unlock it. Holding the Holder Stopper at the position indicated (b), remove it from the Roll Holder . |
 |
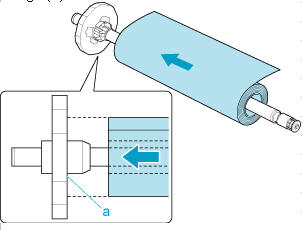
| 4. With the edge of the roll paper facing back as shown, set the roll with the Roll Holder from the right. Insert the roll firmly until it touches the flange (a) of the Roll Holder . |
 |
| <Important> |
- Set the roll on a table or other flat surface so that it does not roll or fall. Rolls are heavy, and dropping a roll may cause injury.
|
- When loading a roll, be careful to avoid hitting the printer hard with the roll. This may damage the Roll Holder.
|
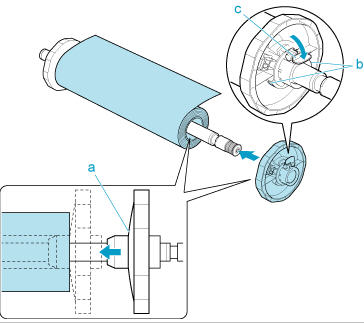
| 5. Insert the Holder Stopper from the right in the Roll Holder as shown. Holding it at the position indicated (b), push it firmly in until the flange (a) of the Holder Stopper touches the roll. Lock the Holder Stopper lever (c) by pushing it down toward the shaft side. |
 |
| 6. Holding the Roll Holder so that the side with the white gear faces the side of the Roll Holder Slot with a white gear, load the Roll Holder shaft (a) into the grooves (b) on ends of the Roll Holder Slot . |
 |
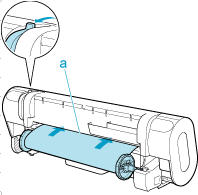
| 7. Push the Release Lever back and pull out the roll paper evenly on ends. Insert the edge in the Paper Feed Slot (a) and advance the paper until vacuuming paper starts. |
 |
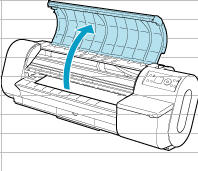
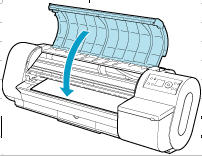
| 8.Open the Top Cover . |
 |
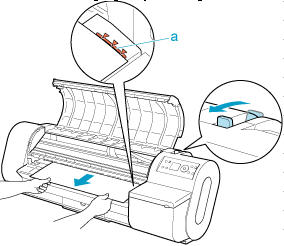
| 9. Pull the roll edge gently and align it with the Paper Alignment Line (a). Lower the Release Lever toward the front. |
 |
| 10. Close the Top Cover . |
 |
| 11. Select the paper type. |
| 12. Select the paper length. |
| 13. Complete settings in the printer driver for the type of paper and other details. |
| 14. Start printing. |
| <Note> |
| -You can skip steps 11 and 12 if a barcode has been printed on the roll paper and you have activated automatic detection of the remaining roll. The paper type and amount of paper left are automatically detected. The barcode will automatically be cut off after it has been read. |
| -You can skip step 12 if you have deactivated automatic detection of the remaining roll paper. |
| -If you have deactivated width detection, you will need to enter the roll width after choosing the paper type in step 11. |
| -If you select a type of paper for which width detection is Off when detection of the remaining roll paper is also Off, you will need to advance the paper manually to the starting position for printing. |
