| Article ID: ART105322 |
| |
Date published: 05/11/2015 |
| |
Date last updated: 08/15/2015 |
Description
Scanning Film in Advanced Mode (5600F / 9000F)
Solution
Scanning Film in Advanced Mode (5600F / 9000F)
In Advanced Mode, you can specify the color mode, output resolution, image brightness, color tone, etc. when scanning documents.
This section explains how to scan film.
Note: The following is explained using Windows Vista procedures.
1. Place the film on the Platen, then start ScanGear (scanner driver).
2. Click Advanced Mode.
The Advanced Mode tab appears.
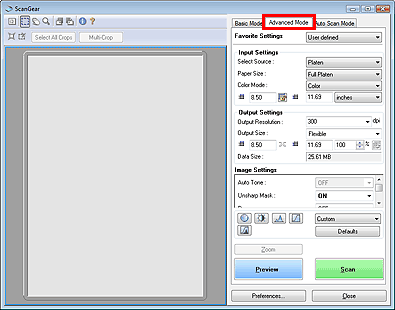
Note: Settings are not retained when you switch between modes.
3. Set Select Source, Film Size and Color Mode.
4. Click Preview.
Preview image appears in the Preview area. Images are cropped (scan areas are specified) automatically according to the film size. Select the checkboxes of the frames you want to scan.
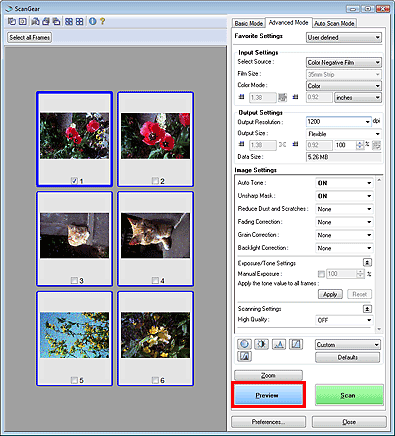
Note: If mounted negative slides cannot be scanned correctly, adjust the cropping frames.
5. Set Output Settings.
6. Adjust the cropping frame, correct image and adjust colors as required.
Note: See the corresponding sections below for details on Image Settings and the Color Adjustment Buttons.
7. Click Scan.
Scanning starts.
Note: ScanGear's response after scanning can be specified in Status of ScanGear dialog after scanning on the Scan tab of the Preferences dialog box.
