 Protecting Images
Protecting an image prevents it from being erased accidentally.
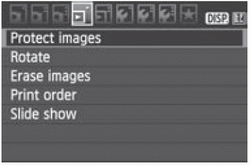 |
1 Select [Protect images].
- Under the [
 ] tab, select [Protect images], then press < ] tab, select [Protect images], then press < >. >.
- The protect setting screen will appear.
|
 |
2 Select the image and protect it.
- Press the <
 > key to select the image to be protected, then press <>. > key to select the image to be protected, then press <>.
- When an image is protected, the <> icon will appear on the top of the screen.
- To cancel the image protection, press <> again. The <> icon will disappear.
- To protect another image, repeat step 2.
- To exit the image protection, press the <MENU> button. The menu will reappear.
|
If you format the card, the protected images will also be erased.
- Once an image is protected, it cannot be erased by the camera's erase function. To erase a protected image, you must first cancel the protection.
- If you erase all the images, only the protected images will remain. This is convenient when you want to erase unnecessary images all at once.
