Untitled Document
Ensure that the ink tank is installed properly.
Install the Ink Tanks
1.Install the Ink Tanks
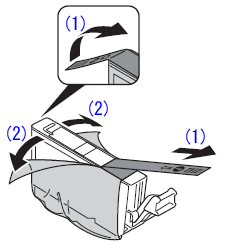
(1) Remove the orange tape completely.
(2) Remove the protective film completely.

important:
- Handle the ink tanks carefully. Do not drop or apply excessive pressure to them.
- Be sure to use the supplied ink tanks.
- If the orange tape remains on the L-shape air hole, ink may splash or the printer may not print properly.
- If you push the sides of the ink tank with the L-shape air hole blocked, ink may splash.
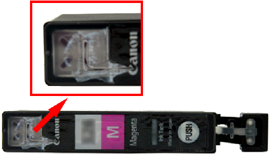
2.Hold the ink tank with the orange protective cap (A) pointing up while being careful not to block the L-shape air hole (B).

3.


Hold the ink tank by its sides and slowly twist the orange protective cap 90 degrees horizontally to remove it off.
Do not push the sides of the ink tank.
important:
Do not touch the inside (C) of the orange protective cap or the open ink port (D). The ink may stain your hands if you touch them.
4. Tilt the ink tank, then insert it under the label and against the back end of the slot.
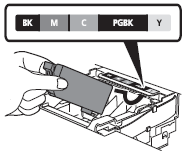
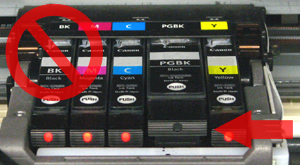
Make sure that the color of the label matches the ink tank.
5.

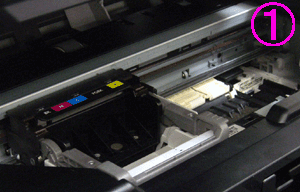
Press the PUSH mark on the ink tank firmly until it clicks.
When the installation is completed properly, the Ink lamp lights red.
6.
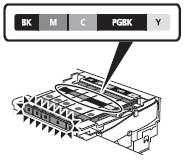
Install all the other ink tanks in the same way according to the color order indicated on the label.
7.

Close the Top Cover (E).
Make sure the Inner Cover (F) is closed.
