Attention:
- In this section, Mac OS X (v10.6), CameraWindow Ver8.3 is used as an example to explain the operation. Depending on your Mac OS X version, the screen indications and operation procedures may vary slightly.
- In order to perform this operation, it is necessary to install CameraWindow from the CD-ROM DIGITAL CAMERA Solution Disk supplied with the product.
- In this section, PowerShot S95 is used as an example to explain the operation. Depending on your model, the position of buttons, screen indications, and setting items may vary.
- This section provides step-by-step procedures for transferring newly captured images from the camera to a computer.
1. Connect the camera's digital terminal and the Macintosh's USB terminal with the supplied interface cable.
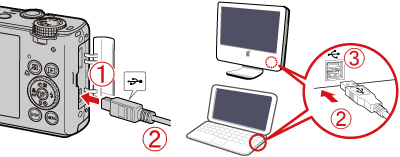
 DIGITAL terminal on the camera
 Interface cable
 Macintosh's USB terminal
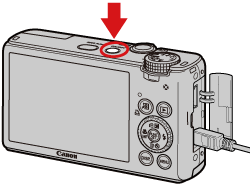
2. Press the Power button on the camera.
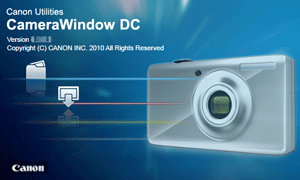
3. The following window appears.
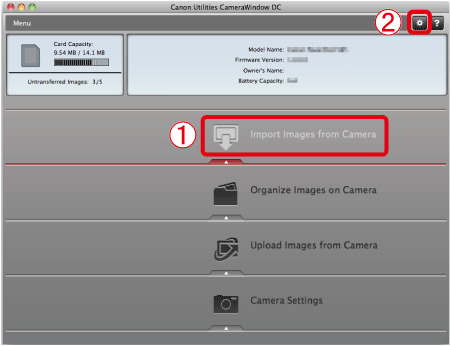
4. The CameraWindow menu appears.
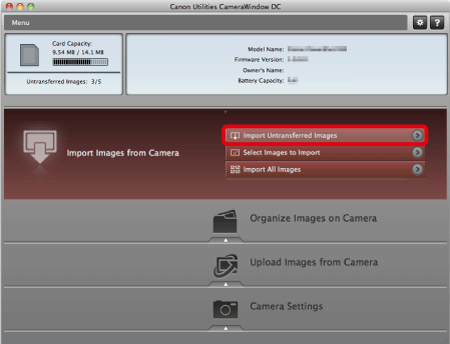
Click Import Images from Camera.
By default, the imported images will be saved separated by each shooting date in the picture folder.
If you want to change the folder to save transferred images, click ( ) on the upper-right side of the window, click Import > Folder Settings, and then click Browse to change the setting.
5. The following window appears, so click Import Untransferred Images.
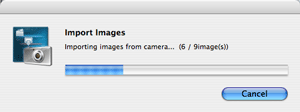
6. The following window appears, and the computer starts to transfer images from the camera.
7. Click OK.

8. The following window appears.
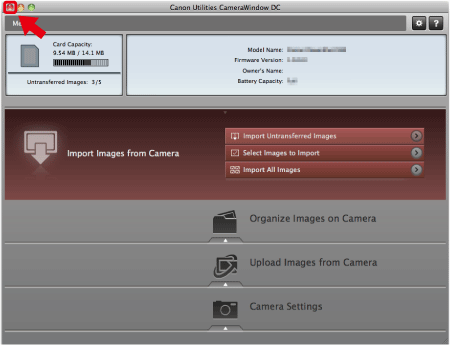
Click the ( ) button to close this window.
A related application (ImageBrowser by default) will start automatically and the imported images are displayed.
