Set the port manually if the Printer is not found during installation

Follow the procedure below to select the port for which the machine's IP address is set, or add a port if the port for the machine has not yet been configured.
1. Click [Back].

2.Click [Back].

3.Select [Manually Set Port to Install] and click [Next].

4. Click [Next].

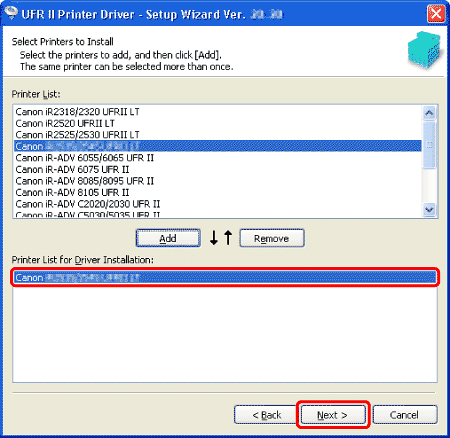
5. In [Printer List], select [Canon MF9200 Series UFRII LT] and click [Add].

6. Select the added printer and click [Next].
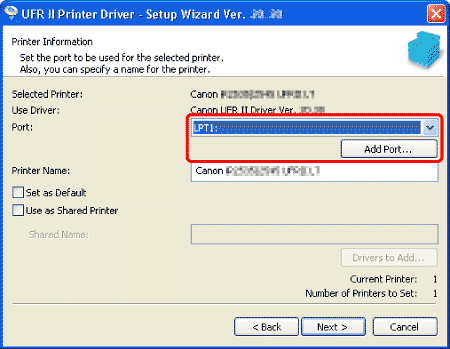
7. In the [Port] drop-down list box, check if the correct port is selected.
 If the IP address assigned to the machine is found in the list, select the IP address. Skip to step 12.
If the IP address assigned to the machine is not found in the list, click [Add Port]. Skip to step 8.
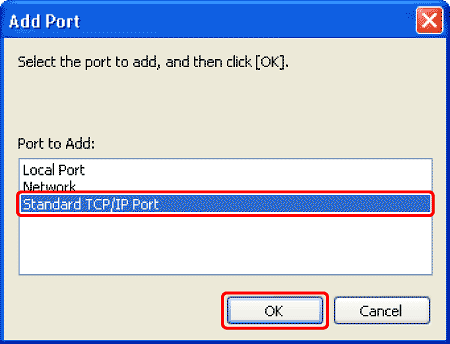
8. In the [Add Port] dialog box, select [Standard TCP/IP Port] and click [OK].
9. In the [Add Standard TCP/IP Printer Port Wizard] window, click [Next].

10. Enter the machine's IP address in [Printer Name or IP Address] and click [Next].

note:
Your entry in [Printer Name or IP Address] is automatically copied in [Port Name].
11. Click [Finish].

12. Click [Next].

13. Follow the instructions on the screen to continue the installation.
