You can adjust the size and data volume of an image according to the purpose of use by changing the recording pixels and compression ratio of the image.
For example, you increase the recording pixels when you want to print the image on a large piece of paper, and decrease them when you want to attach the image to your email.
This section explains the method for changing the recording pixels and compression ratio of an image taken.
Attention:
- We explain by using the example where the recording pixel and compression ratio settings have never been changed.
1. Press the <Power> button on the camera.
2. Press the <FUNC./SET>  button.
3. Change the recording pixel setting of the image.
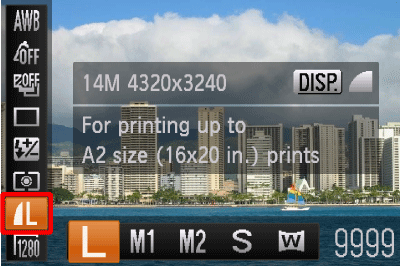
Operate the <directional buttons> up or down to select  .
.
4. Select a recording pixel setting of your choice.
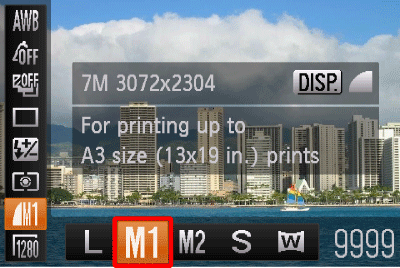
Operate the <directional buttons> left or right to select the recording pixel setting you want to change to. (The Medium 1  setting is selected in the image shown above.)
5. Change the compression ratio setting of the image. If you press the <DISP.>  button, the following screen appears.
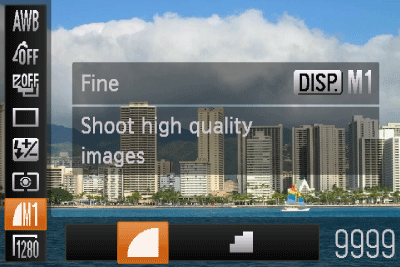
6. Select a compression ratio setting of your choice.
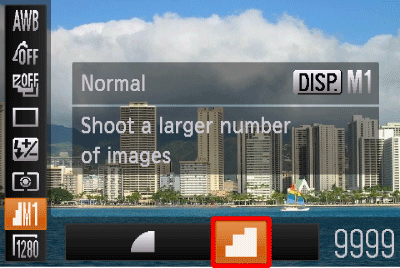
Operate the <directional buttons> left or right to select the compression ratio* setting you want to change to. (The Normal  setting is selected in the image shown above.)
After making the selection, press the <FUNC./SET> button.
*The two levels of compression ratios (in order of lowest to highest) and image quality (in order of highest to lowest) are :Fine  and Normal .
