Changing the Port Settings
Change the computer's port settings according to the machine's newly assigned or manually specified IP
address.
note:
- In the following procedures, items displayed on the screen for Windows Vista are used; items might differ depending on your operating system.
- Log on to Windows with administrator privileges.
1. Open the [Printers], [Printers and Faxes], or [Devices and Printers] folder.
- For Windows 2000, click [Start] on the Windows task bar m² [Settings] m² [Printers].
- For Windows XP Home Edition, click [start] on the Windows task bar m² [Control Panel] m² [Printers and Other Hardware] m² [Printers and Faxes].
- For Windows XP Professional/Server 2003, click [start] or [Start] on the Windows task bar m² [Printers and Faxes].
- For Windows Vista/Server 2008, click [Start] on the Windows task bar m² [Control Panel] m² [Hardware and Sound] m² [Printers].
- For Windows 7/Server 2008 R2, click [Start] on the Windows task bar m² [Devices and Printers].
2. Right-click the icon of the printer you installed m² select [Printer Properties].

If the [User Account Control] dialog box appears in Windows Vista or Windows Server 2008, click [Continue].
3. Click the [Ports] tab m² [Add Port].

4. From [Available port types], select [Standard TCP/IP Port] m² click [New Port].

The Add Standard TCP/IP Printer Port Wizard starts.
5. Click [Next].

6. In [Printer Name or IP Address], enter the machine's IP address or host name m² click [Next].

Your entry in [Printer Name or IP Address] is automatically copied in [Port Name].
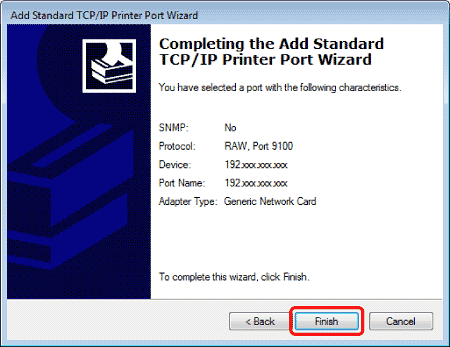
7. Click [Finish].
If the dialog box displays [Additional Port Information Required], follow the instructions on the screen to search again, or click [Standard] m² click [Canon Network Printing Device with P9100] from the pull-down list m² click [Next].
8. Click [Close] to close the [Printer Ports] dialog box.

9. Make sure that the IP address specified in step 6 is added to the port list, and click [Apply].

10. Click [OK].

