Remove the print head or ink tanks properly following the procedure below.
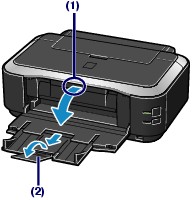
Confirm that the printer is powered on and open the paper output tray and the top cover.
(1) Put your finger in the center of the top of the Paper Output Tray and open it gently.
(2) Extend to open the Output Tray Extension.
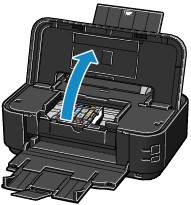
Open the top cover. The print head moves to the replacement position.
Note: When the top cover is opened more than ten minutes, the print head moves to the right side. If this occurs, close the top cover, and open it again.
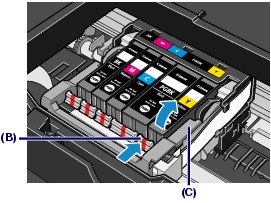
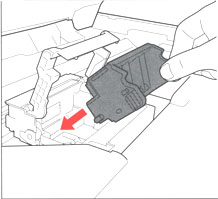
Remove the ink tanks by pressing the tab (B) of each tank, and then lift them out of the printer.
Do no touch the Print Head Lock Lever (C).
Note: Handle the ink tanks with care so that your clothes and surrounding area do not get soiled. When replacing multiple ink tanks, make sure to replace one by one.
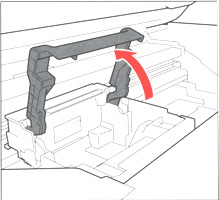
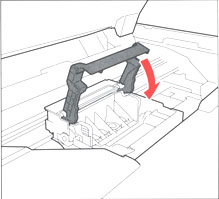
Raise the print head lock lever, and then lift the print head out.
To reinstall the Print Head and Ink Tanks
Place the print head in the holder and lower the print head lock lever carefully until you hear a click.
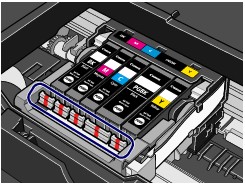
Insert ink tanks into the print head. Press the mark 'PUSH' on the ink tank firmly until you hear a click.
Ensure that all the ink tanks are installed properly and the ink tank lamps light red.
Note: <Ink Tank Lamp> You can check the status of each ink tank according to the way its lamp flashes.
- On: The printer is ready to print.
- Slow flashing (at about three second interval): Ink is low. Prepare a new ink tank.
- Fast flashing (at about one second interval): Ink tank is empty, or the printer is not ready due to an error.
- Off: An error has occurred and the printer is not ready to print.
Put back the inner cover and close the top cover.
Note: When starting printing next time, the print head cleaning launches automatically.
During the print head cleaning, the Power lamp flashes green. Do not do other operations until the flashes stops.