Installing the Toner Cartridge
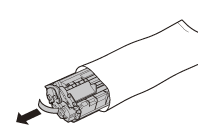
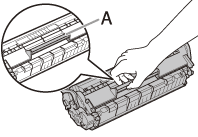
1. Take the toner cartridge from the bag.
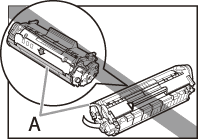
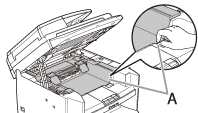
Do not open the drum protective shutter (A).
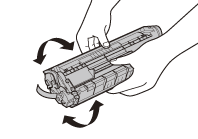
2. Gently rock the toner cartridge several times to evenly distribute the toner inside.
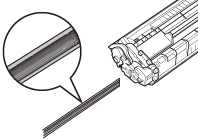
3. Place the toner cartridge on a flat surface and pull the seal completely out.
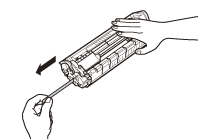
Do not pull the seal out at an angle
If toner is adhered on the removed seal, be careful that your hands or clothes do not get dirty from touching the toner.
If your hands or cloths get dirty from touching the toner, wash them immediately in cold water. Do not use hot water. If you do, the toner may set permanently.
4. Hold the front side of the operation panel with your hands.
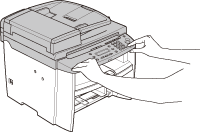
5. Lift the scanning platform (A) until it is locked. (You will hear and audible "click.")

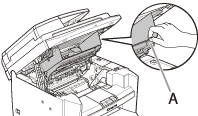
6. Hold the grip (A) on the right front side of the toner cover.
7. Open the toner cover.
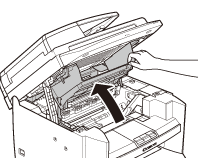
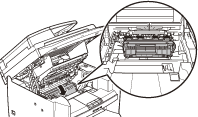
8. Hold the toner cartridge by its handle (A).
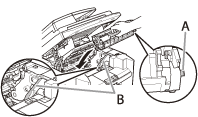
9. Insert the toner cartridge so that the protrusion on the right side of the toner cartridge (A) fits into the guide (B) located on the right side of the machine and slide it down parallel to the guide.
10. Push the toner cartridge to make sure it is properly set in the machine.
11. Hold the grip (A) on the right front side of the toner cover.
12. Close the toner cover.

13. Lower the scanning platform.
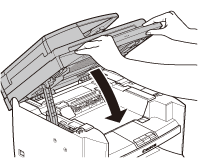
Be careful not to get your fingers caught.
If you cannot close the toner cover, do not force it to close. Open the cover and make sure the toner cartridge is properly set in the machine.
