USB Installation
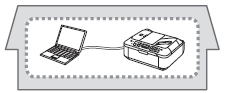
This is the recommended installation when you use the machine on single computer, which is not networked.
Attention:
- Do not connect the USB cable yet.
To use the machine by connecting it to a computer, software including the drivers needs to be copied (installed) to the computer's hard disk. The installation process takes about 20 minutes. (The installation time varies depending on the computer environment or the number of application software to be installed.)
Important:
- Quit all running applications before installation.
- Log on as the administrator (or a member of the Administrators group).
- Do not switch users during the installation process.
- Internet connection may be required during the installation. Connection fees may apply. Consult the internet service provider.
- It may be necessary to restart your computer during the installation process. Follow the on-screen instructions and do not remove the Setup CD-ROM during restart. The installation resumes once your computer has restarted.
Reference:
- Easy-WebPrint EX
Easy-WebPrint EX is Web print software that is installed on the computer when installing the supplied software. Internet Explorer 7 or later (Windows) is required to use this software. An Internet connection is required for installation.
For Spanish Users in the U.S.A.

Refer to the "Información adicional para usuarios españoles" sheet to install the Spanish version of the software.
Windows
Reference:
- If the USB cable is connected before the software is installed
- For Windows 7
(1) Remove the USB cable connected to your computer.
(2) Proceed to 1.
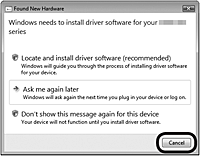
- For Windows Vista / Windows XP
This dialog box may appear.
(1) Remove the USB cable connected to your computer. If the dialog box closes, proceed to 1.
(2) Click Cancel.
(3) Proceed to 1.
1.

Press the ON button (A) to TURN OFF THE MACHINE.
Operating noise may continue for up to 30 seconds until the machine turns off.
- Do not connect the machine to the computer with the USB cable yet. If it is already connected, disconnect the USB cable from the computer.
2.
(1) Make sure that the machine has turned off.
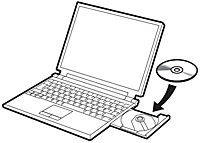
(2) Turn on the computer.
(3) Insert the Setup CD-ROM into the CD-ROM drive.
The setup program starts automatically.
- If the program does not start automatically, double-click the CD-ROM icon in Computer or My Computer. When the CD-ROM contents appear, double-click MSETUP4.EXE.
3. (Windows 7 / Windows Vista)
Windows XP -> 4
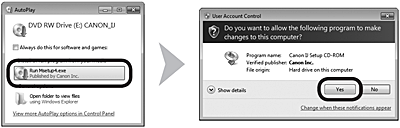
Click Run Msetup4.exe on the AutoPlay screen, then click Yes or Continue on the User Account Control dialog box.
If the User Account Control dialog box reappears in following steps, click Yes or Continue.
4.
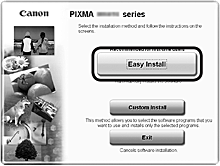
Click Easy Install.
The drivers, application software, and on-screen manuals are installed.
- If you want to select particular items to install, click Custom Install.
5.
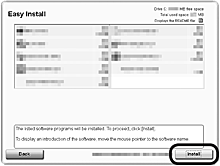
Click Install.
6.
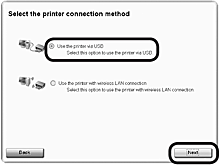
Select Use the printer via USB, then click Next.
Follow any on-screen instructions to proceed with the software installation.
Important Information for the Installation
- USB Port
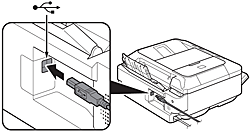
When the Printer Connection screen appears, connect the machine to the computer with a USB cable.
After connecting the cable, TURN ON THE MACHINE.
The USB Port is located near the center on the back of the machine.
- The supplied network setup cable can be used as well.
If the serial number is not displayed on the registration screen, input the number found inside the machine.
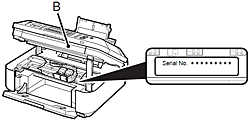
- If the power is on, the FINE Cartridge Holder will move when the Scanning Unit (Cover) (B) is opened.
- If the Extended Survey Program screen appears

If you can agree to Extended Survey Program, click Agree.
If you click Do not agree, the Extended Survey Program will not be installed. (This has no effect on the machine's functionality.)
7.

Click Exit to complete the installation.
8.
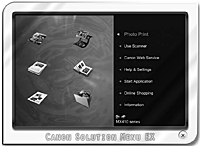
Solution Menu EX starts.
Remove the Setup CD-ROM and keep it in a safe place.
- The buttons displayed on Solution Menu EX may vary depending on the country or region of purchase.
- Installing the XPS Printer Driver
In Windows 7 and Windows Vista SP1 or later, the XPS Printer Driver can be installed additionally. To install, perform from 1 in [ Windows ]. Click Custom Install in 4, then select XPS Printer Driver in the Custom Install screen.
