 When you perform this operation, all print jobs are deleted. However, users without permission for printer management cannot delete the print job of another user.
Delete print jobs from the print queue
Follow these steps:
-
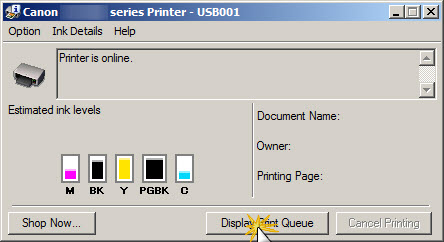
To display the print job, click Display Print Queue.
-
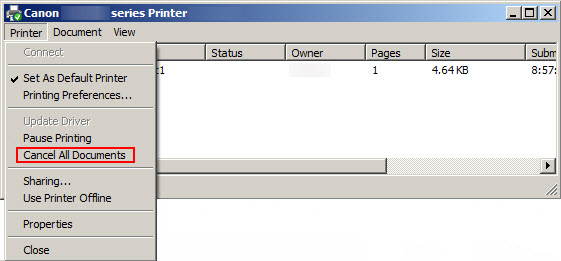
To delete the print jobs, from the Printer menu, select Cancel All Documents.
-
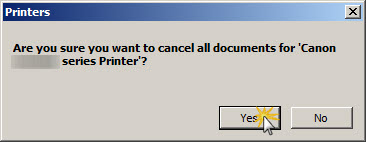
When the confirmation message appears, click Yes.
 If print items do not clear, you can try the manual process. After the print jobs are deleted manually, the printer spooler will need to be restarted. Please see steps below to manually delete print jobs and restart the spooler.
Manual Process
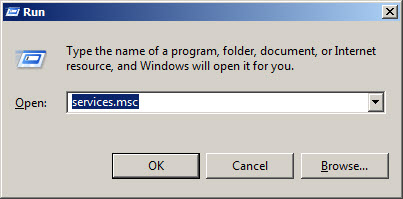
Hold the Windows  key on your keyboard and press R. This will open the Run box.
-
In the Run box, type services.msc. Then, click OK.
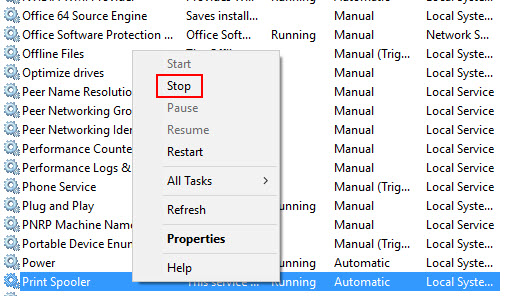
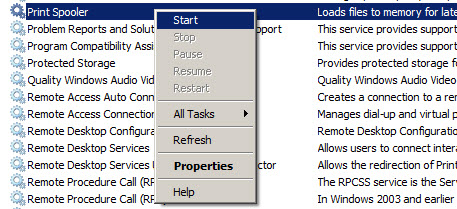
- The Services window will open. In this window, scroll down to the Print Spooler. Right-click it and click Stop.
Minimize this window after the print spooler has stopped.
-
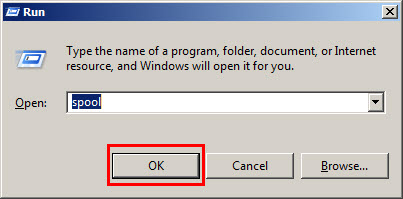
After the print spooler service has stopped, hold the Windows key on your keyboard and press R to open the Run box. In this box, type spool and click OK.
-
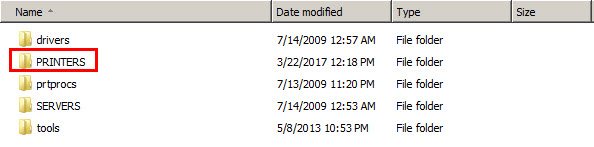
In the spool folder, open the PRINTERS folder.
-
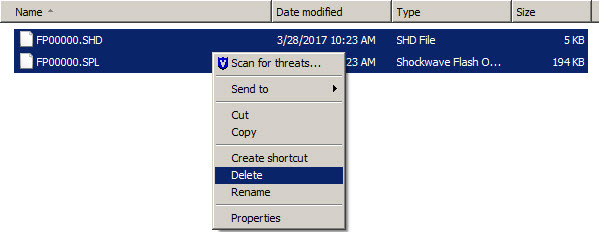
Delete any files in this folder.
-
After these files have been deleted, close the spool folder.
-
Go back to the Services window. Right-click on the Print Spooler service and click Start.
Any print jobs that were queued will be deleted.
If your product issue was not resolved after following the steps above, or if you require additional help, please create or log in to your Canon Account to see your technical support options.
Or if you still need help, visit our Canon Community by clicking the button below to get answers:

____________________________________________________________________________________________
