Prevent Paper Abrasion
Selecting Prevent paper abrasion setting widens the clearance between the print head and the loaded paper. If you notice abrasion even with the media type set correctly to match the loaded paper, set the machine to Prevent abrasion by using the operation panel or the computer.
Print speed may be reduced if you are selecting the Prevent paper abrasion setting.
* Deactivate (set it to OFF) the Prevent paper abrasion setting once printing is complete. If not, this setting remains enabled for all subsequent print jobs.
- Press the Menu button repeatedly until Device settings appears.
- Use the
 or
or  button to select Print settings and then press the OK button.

- Use the or button to select Prevent abrasion and then press the OK button.
-
Use the or button to select ON or OFF and then press the OK button.
- Select ON to widen the clearance between the print head and paper.
- Select OFF to maintain a standard distance between the print head and paper.
- Press the COPY button to return to standby mode.
Click here to set Prevent abrasion on a Windows computer
Click here to set Prevent abrasion on a Macintosh computer

-
Open the printer driver setup window through the Start menu .
-
Windows 7
- Select the Start menu and then Devices and Printers.
- Right-click your model name icon, and then select Printing Preferences from the displayed menu.
The printer driver setup window appears.
-
Windows Vista
- Select the Start menu -> Control Panel -> Hardware and Sound -> Printers.
- Right-click your model name icon, and then select Printing Preferences from the displayed menu.
The printer driver setup window appears.
-
Windows XP
- Select the Start menu -> Control Panel -> Printers and Other Hardware -> Printers and Faxes.
- Right-click your model name icon, and then select Printing Preferences from the displayed menu.
The printer driver setup window appears.
- Click Custom Settings
 on the Maintenance tab.
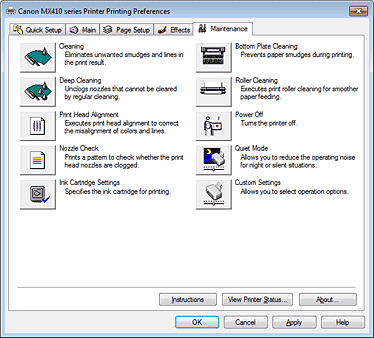
- Click the Prevent paper abrasion box.
A check in this box will increase the gap between the print head and the paper during high-density printing to prevent paper abrasion.
- Click OK to apply the settings.
- Then click OK again in the Printing Preferences window.
 Note: Remove the check from the Prevent paper abrasion box once printing is complete.
- Repeat steps 1 through 5 to disable Prevent paper abrasion (remove the check mark).

- Make sure that the machine is on.
- Open System Preferences, and select Print & Fax.
-
Start the Canon IJ Printer Utility.
-
Mac OS X v.10.6.x:
- Select your model from the Printers list, and click Options & Supplies.
- Click Open Printer Utility in Utility tab.
- Canon IJ Printer Utility is launched.
-
Mac OS X v.10.5.x or Mac OS X v.10.4.11:
- Select your model from the Printers list, and click Open Print Queue (Print Queue).
- Click Utility when a list of print jobs is displayed.
- Canon IJ Printer Utility is launched.
- Select Custom Settings from the pop-up menu on the Canon IJ Printer Utility.
- Click the Prevent paper abrasion box.A check in this box will increase the gap between the print head and the paper during high-density printing to prevent paper abrasion.
- Click Apply, and click OK when the confirmation message appears.
The machine runs in the changed mode hereafter. Note: Remove the check from the Prevent paper abrasion box once printing is complete.
- Repeat steps 2 through 6 to disable Prevent paper abrasion (remove the check mark).
Click here to set Prevent abrasion on the operation panel.
