If the Machine's IP Address Has Been Changed
If the machine is used in a network with a DHCP server and assigned an IP address automatically, printing from a computer may suddenly stop working.
This could be caused by a restart of the router, which may change the machine's IP address.

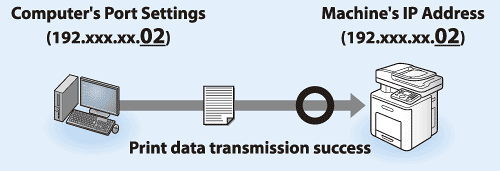
To resume printing again, you need to reset the same IP address on the machine and in the computer's port settings.
Change the computer port settings using one of the following methods:
Check the machine's updated IP address and change the port settings:
note:
Solving the problem using this method is relatively easier. However, whenever the machine's IP address is changed by restarting the router, the port settings need to be reconfigured. If the IP address is subject to frequent changes, set the IP address manually or configure a DHCP address reservation/exclusion on the router (by using a manual address assignment or static address assignment).
1. Check the machine's updated IP address.
2. Change the port settings on the computer.
Click here for instructions.
Manually set the machine's IP address and change the port settings:
1. Check the machine's IP address.
Note:
It is also possible to set an arbitrary IP address instead of the one assigned to the machine. To set an arbitrary IP address to the machine, check the IP addresses of other devices on the same network, and then change the last two or three digits of the machine's IP address to a number that is not used.
Example (If the machine and two computers are connected to the same network):
IP address for computer1: 192.xxx.xx.01
IP address for computer2: 192.xxx.xx.02
IP address assigned automatically to the machine: 192.xxx.xx.03
Arbitrary IP address that is to be assigned manually to the machine: 192.xxx.xx.20*
* In general, a router (DHCP server) assigns consecutive IP addresses to the devices on the network. It is recommended that you select a number away from other IP addresses already assigned as a local address so that the same IP address will not be assigned when other devices or computers are connected to the network. If an IP address already set to one device is assigned to other devices or computers on the same network, these devices or computers may not be able to connect to the network.
2. Manually set the machine's IP address.
Note:
You do not need to change the subnet mask or gateway address settings.
3. Change the port settings on the computer.
Click here for instructions.
Configure the router to reserve a distinct IP address for the machine:
Configure the router to use the manual address assignment or static address assignment, which reserves a distinct IP address for a device in a DHCP environment, so that the machine's IP address is not changed when the router is restarted. (The names of these features may vary depending on the manufacturer of the router used.) For more information, see the documentation that comes with your router. After configuring the router, change the port settings on the computer.
Change the computer's port settings according to the machine's newly assigned or manually specified IP address.
note:
- In the following procedures, items displayed on the screen for Windows Vista are used; items might differ depending on your operating system.
- Log on to Windows with administrator privileges.
1. Open the [Printers], [Printers and Faxes], or [Devices and Printers] folder.
- For Windows 2000, click [Start] on the Windows task bar m² [Settings] m² [Printers].
- For Windows XP Home Edition, click [start] on the Windows task bar m² [Control Panel] m² [Printers and Other Hardware] m² [Printers and Faxes].
- For Windows XP Professional/Server 2003, click [start] or [Start] on the Windows task bar m² [Printers and Faxes].
- For Windows Vista/Server 2008, click [Start] on the Windows task bar m² [Control Panel] m² [Hardware and Sound] m² [Printers].
- For Windows 7/Server 2008 R2, click [Start] on the Windows task bar m² [Devices and Printers].
2. Right-click the icon of the printer you installed m² select [Printer Properties].
note:
If the [User Account Control] dialog box appears in Windows Vista or Windows Server 2008, click [Continue].
3. Click the [Ports] tab m² [Add Port].
4. From [Available port types], select [Standard TCP/IP Port] m² click [New Port].
The Add Standard TCP/IP Printer Port Wizard starts.
5. Click [Next].
6. In [Printer Name or IP Address], enter the machine's IP address or host name m² click [Next].
Your entry in [Printer Name or IP Address] is automatically copied in [Port Name].
7. Click [Finish].
If the dialog box displays [Additional Port Information Required], follow the instructions on the screen to search again, or click [Standard] m² click [Canon Network Printing Device with P9100] from the pull-down list m² click [Next].
8. Click [Close] to close the [Printer Ports] dialog box.
9. Make sure that the IP address specified in step 6 is added to the port list, and click [Apply].
10. Click [OK].
