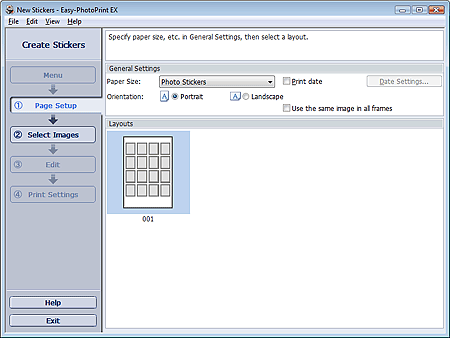
Set Paper Size, Orientation, etc. in the General Settings section.
Note:
Paper sizes other than Photo Stickers cannot be selected.
You can customize the date (position, size, color, etc.) in the Date Settings dialog box.To display the Date Settings dialog box, select the Print date checkbox and click Date Settings.
Select the Use the same image in all frames checkbox to use the same image in all the frames on the page.
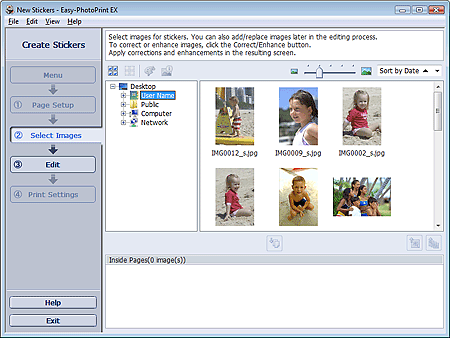
Click Select Images in the step button area on the left side of the screen.
The Select Images screen appears.
Select the folder that contains the image you want to print from the Folder Tree area.
The images in the folder will be displayed as thumbnails (miniatures).
Note:
You can also use still images captured from videos.
You can also use images downloaded from photo sharing sites on the Internet.
Select the image(s) you want to print and click (Import to Inside Pages).
The selected image(s) is (are) displayed in the selected image area.
You can also select the image(s) you want to print by dragging it (them) into the selected image area.
Note:
To delete an image in the selected image area, select the image you want to delete and click (Delete Imported Image).
To delete all images from the selected image area, click (Delete All Imported Images).
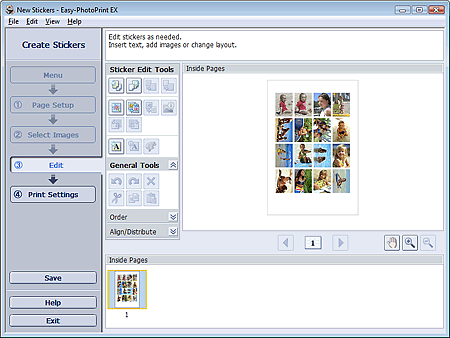
Click Edit in the step button area on the left side of the screen.
The Edit screen appears.
Edit the stickers if necessary.
Important:
The edit information will be discarded if you exit Easy-PhotoPrint EX without saving the edited stickers.It is recommended that you save the item if you want to edit it again.
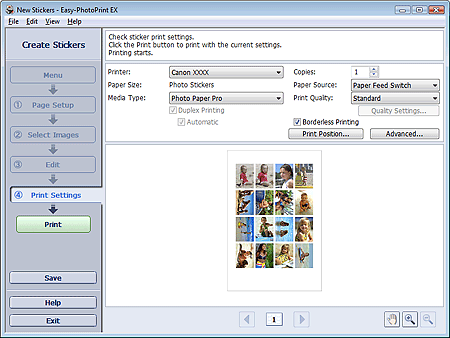
Click Print Settings in the step button area on the left side of the screen.
The Print Settings screen appears.
Set Media Type, Paper Source, etc. according to the printer and paper to be used.
Note:
The media types may vary depending on the printer and the paper size.
The paper sources may vary depending on the printer and the media type.
You can set a custom print quality level in the Print Quality Settings dialog box.To display the Print Quality Settings dialog box, select Custom for Print Quality and click Quality Settings.
You can adjust the printing position in the Adjust Print Position dialog box.To display the Adjust Print Position dialog box, click Print Position.
You can specify the print range and the amount of extension for borderless printing in the Print Settings dialog box.To display the Print Settings dialog box, click Advanced.
Click Print in the step button area on the left side of the screen.