Setting the Wireless LAN Using WPS
Switching the Connection Method to Wireless LAN
1. Press [  ] (Menu).
2. Select <Network Settings> with [  ] or [
  ], and then press [OK].


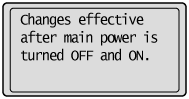
The next screen is displayed for approximately 5 seconds.
Turn OFF/ON using Step 5. Turning this OFF/ON is not required.
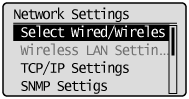
3. Select <Select Wired/Wireless LAN> using [ ] or [ ], and then press [OK].
4. Select <Wireless LAN> using [ ] or [ ], and then press [OK].

5. Restart the machine when the following screen disappears.
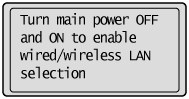
It is necessary to turn the machine OFF/ON to activate the settings.
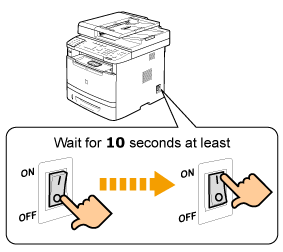
Turn OFF the machine and wait for at least 10 seconds before turning it back ON.
Setting the Machine Using WPS (Push Button Mode)
1. Press [ ] (Menu).
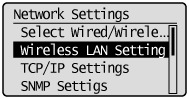
2. Select <Network Settings> with [ ] or [ ], and then press [OK].

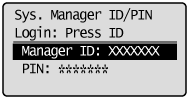
 When the system manager ID and system manager PIN are specified
Use the numeric keys to enter the ID and number, and then press [  ] (Log In/Out).
3. Select <Wireless LAN Settings> using [ ] or [ ], and then press [OK].
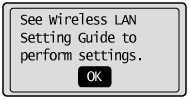
4. Press [OK].
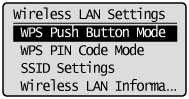
5. Select <WPS Push Button Mode> using [ ] or [ ], and and then press [OK].
6. Press [  ] to select <Yes>, and press [OK].

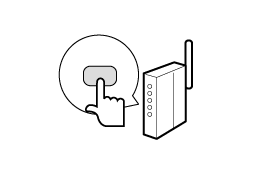
7. Within 2 minutes, press and hold the WPS button on the wireless LAN router and/or access point for approximately 5 seconds.
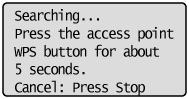
* If "Cannot find Access Point" appears, press [OK] to close the screen, and follow the procedure from Step 5.

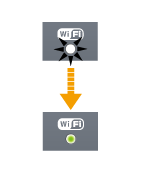
8. Make sure the Wi-Fi indicator blinks.
When the wireless LAN router or access point is detected, the Wi-Fi indicator blinks.
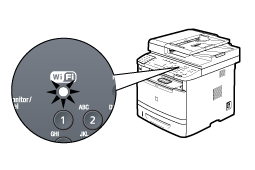
The next screen is displayed for approximately 2 seconds, and then the Wi-Fi indicator lights.
* When the message appears, press [OK] to close the screen and start the procedure again from Step 5.
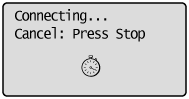
9. Wait until the machine sets the IP address automatically (approx. 2 min).
Checking the Wireless LAN Setting is Completed
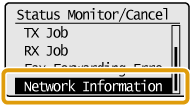
1. Press [  ] (Status Monitor/Cancel).
2. Select <Network Information> with [ ] and [ ], and then press [OK].
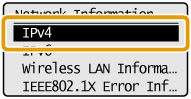
3. Select <IPv4> with [ ] and [ ], and then press [OK].
4. Select <IP Address> with [ ] and [ ], and then press [OK].
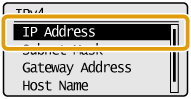
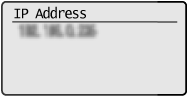
5. Take note of the IP address.
6. Press [ ] (Status Monitor/Cancel) to close the screen.
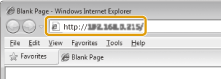
7. Start the web browser of a computer which is connected to a network.
8. Enter http://<IP address of the machine>/ in the address field, and then press the [ENTER] key on your keyboard. The <IP address of the machine> is the address noted in step 5 above.
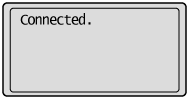
9. Check that the screen of the Remote UI is displayed.
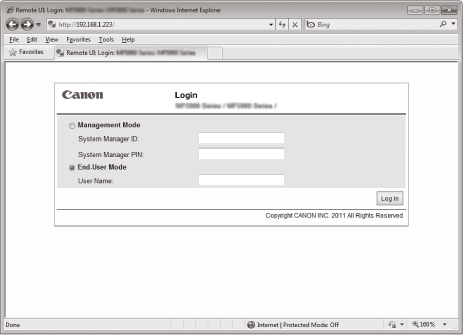
note:
When the Remote UI is not displayed
- Peform steps 1 to 9 again.
