Cropping an image is the act of removing the unnecessary portions of the image by selecting the necessary portions.
Capture still images in the Video Frame Capture window, then click Adjust Cropping Area in the Layout window.
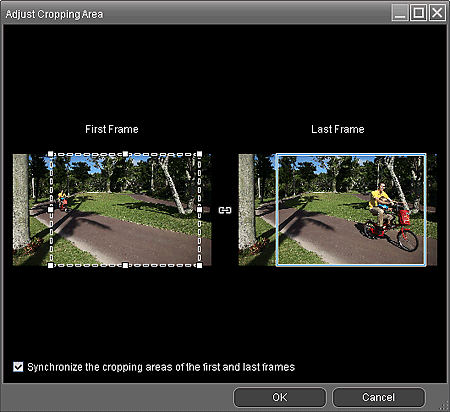
Drag the white squares on the image to adjust the area to be cropped and click OK.
 Note
NoteYou can adjust the cropping area size on the First Frame or Last Frame. You cannot adjust the cropping area size by specifying the frames between the First Frame and Last Frame.
The cropping area size will be the same for all frames.
To move the cropping area, place the cursor within the white frame and drag it. Drag the white lines to enlarge/reduce the cropping area.
Select the Synchronize the cropping areas of the first and last frames checkbox to crop from the First Frame to Last Frame in the same position.
When this checkbox is selected, the  (Synchronize) mark appears between the First Frame and Last Frame.
For full high definition and high definition videos, set the cropping frame to the maximum size to display the entire image.
See Help for details on the Adjust Cropping Area window.
