Port Settings to Print in a TCP/IP Environment
Configure port settings on your computer to print to the machine.
| Configure port settings on your computer when: | Steps to take |
| Installing the printer driver using [Add Printer]. | Note that a different IP address is assigned to the installed printer driver. To use the IP address of the machine, configure port settings on your computer after installation. |
| Changing the IP address of the machine. | Configure port settings on your computer to use the IP address of the machine. |
note:
- The dialog box that appears on your computer
The dialog box may vary slightly, depending on the version of your operating system.
Setting the Port
1. Open the printer folder.
From the [Start] menu, select [Settings] -> [Printers].
- Windows XP Professional/Server 2003
From the [Start] (or [start]) menu, select [Printers and Faxes].
From the [start] menu, select [Control Panel] -> [Printers and Other Hardware] -> [Printers and Faxes].
From the [Start] menu, select [Control Panel] -> [Printer].
From the [Start] menu, select [Devices and Printers].
From the [Start] menu, select [Control Panel] and then double-click [Printers].
2. Right-click the icon for the machine and select [Printer properties] (or [Properties]).

3. Click the [Ports] tab.

4. Click [Add Port].

5. Select [Canon MFNP Port] for [Available port types] and click [New Port].

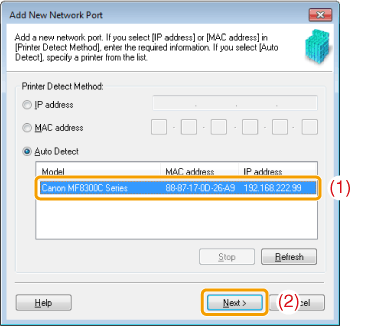
6. Click [Auto Detect].
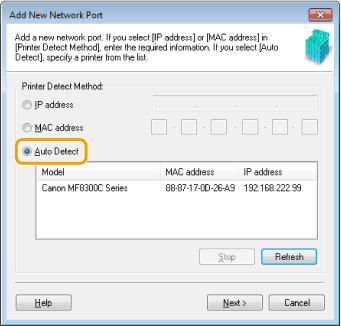
note:
When you cannot perform Auto Detect, enter the IP address or MAC address of the machine manually.
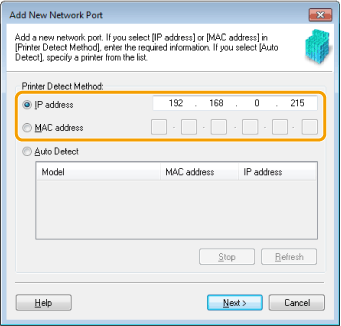
- You can check the IP address of the machine in "Setting the IP Address" in "".
- You can check the MAC address of the machine in "Checking the MAC Address" in the e-Manual.
7. Select the detected printer and click [Next].
8. Click [Add].

9. Click [Finish].

10. Click [Close].
11. Click [Apply].
