Follow the procedure below to set up your printer wirelessly.
1) Double-click the LBP7110Cw Driver on your desktop.
2) Open the [Network_Setting_Tool] folder.
3) Depending on your OS you will either see a 32-bit or 64-bit folder. Open the appropriate folder for your operating system, and then double-click the [Canon MF/LBP Network Setup Tool] icon.

4) If the User Account Control dialog box appears, click [YES] or [CONTINUE].
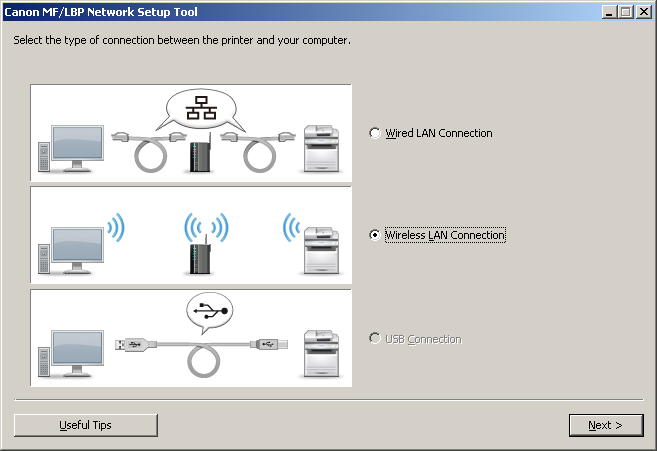
5) Select the [Wireless LAN Connection] radio button, and then click [NEXT].
6) Select the [Yes, I want to configure network settings] radio button, and then click [Next].

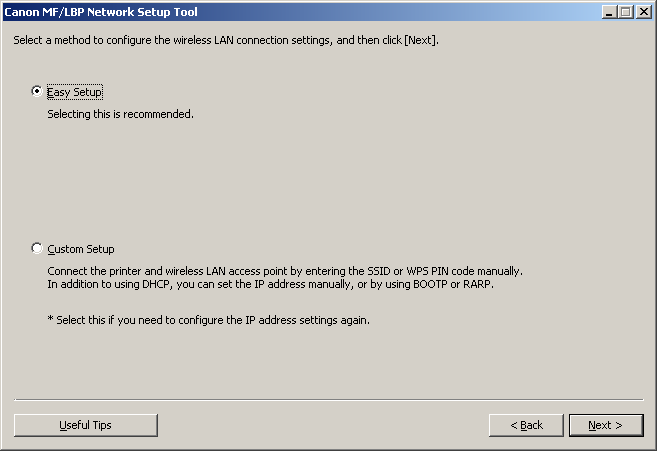
7) Select the [Easy Setup] radio button, and then click [Next].
8) Check to see if your wireless router has a WPS button, and select the appropriate radio button, as shown in the screen below.
If you are not sure which connection method to use, click [Useful Tips] first or select My wireless LAN access point does not have a WPS button or I cannot find the button.

WPS Router Instructions
1) If your router has a WPS button, select [My wireless LAN access point has a WPS button], and then click [Next].
If your router does not have a WPS button, follow the instructions on Non-WPS Supporting Router Instructions on p. 18.
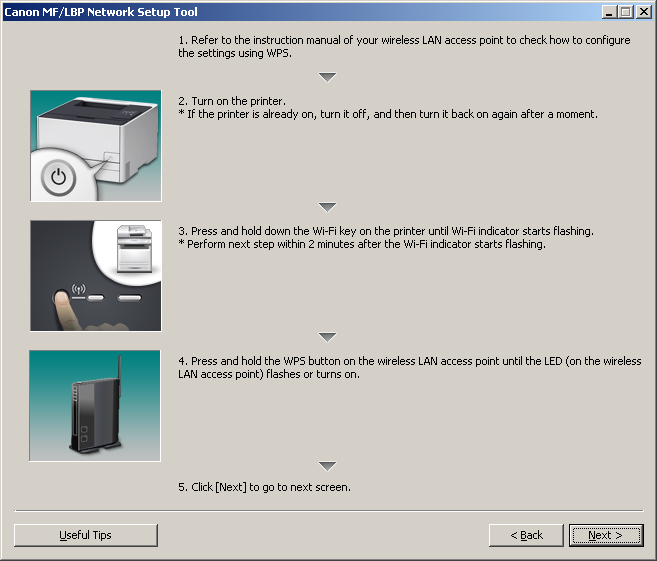
2) Follow the instructions on the screen, as shown below, and then click [Next].
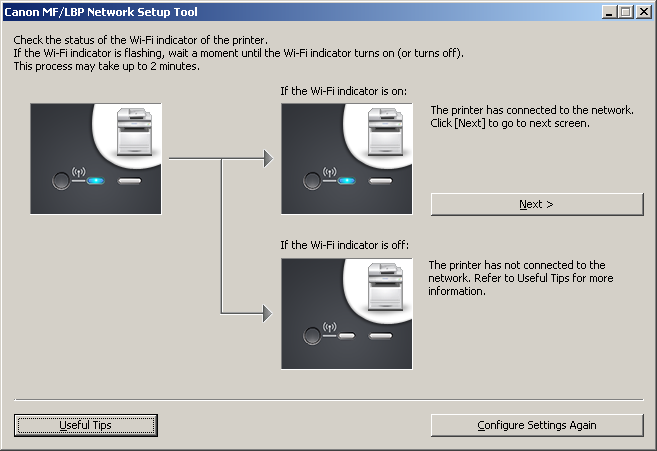
3) When the Wi-Fi indicator turns solid blue, the printer is connected wirelessly. Click [Next].
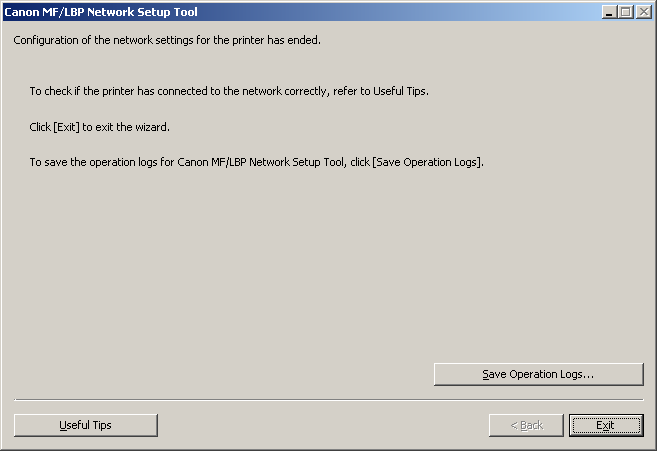
4) Click [Exit].
5) To complete the wireless setup process, proceed to Completing the Wireless Set Up on p. 23.
Non-WPS Supporting Router
1) If your router does not have a WPS button, select [My wireless LAN access point does not have a WPS button or I cannot find the button], and then click [Next].

2) Follow the instructions on the screen, as shown below, and then click [Next].

The screen below appears while searching for your wireless network.

If the message shown below appears, read the message, and then click [OK].

Make sure that the USB cable is connected to your computer and to the LBP7110Cw, and make sure that the printer is turned ON. Click [Next].
3) When a list of wireless networks appears, select your wireless network, and then click [Next].

4) If your computer is already connected to the same wireless network as the printer, you do not have to enter your network key. If your computer is not connected to the same wireless network as the printer, enter the Network Key in the blank field, and then click [Next].
While the screen below appears, the Wi-Fi indicator on your printer blinks blue. When the printer is connected to the network, the Wi-Fi indicator turns solid blue.

5) Disconnect the USB cable from your printer, and then click [Next].

6) Click [Exit] to exit the Network Setup Tool.
