|
This camcorder is equipped with an optical axis shift and a focal length guide function for use in a dual camera setup for 3D recording.
Using Optical Axis Shift
This function aids in a dual camera setup for 3D recording by allowing you to adjust the position of the image stabilization lens.
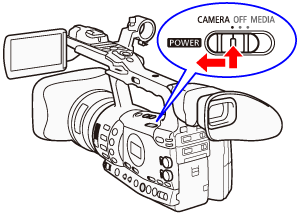
1. Hold down the button on the <POWER> switch and move it to <CAMERA>.
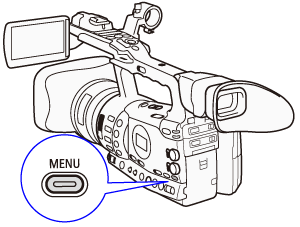
2. Press the <MENU> button.
3. Select optical axis shift.
Push the joystick up/down or turn the <SELECT> dial to select the desired submenu, and then press <SET>.
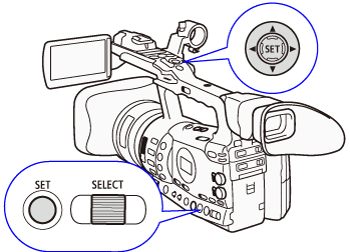
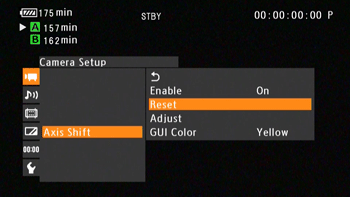
3-1. Select [Camera Setup] > [Axis Shift] > [Enable].

3-2. Select [On], and then press <SET>.

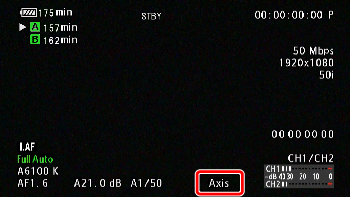
3-3.  appears on the bottom of the screen.
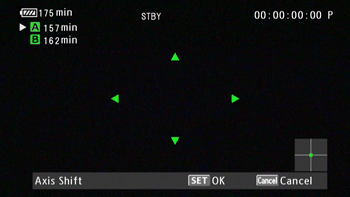
4. Open the optical axis [Adjust] screen.
4-1. Select [Camera Setup] > [Axis Shift] > [Adjust].

4-2. Four directional icons appear on the screen.
Use the joystick or wireless controller to adjust the picture.

NOTE
- If the picture cannot be adjusted anymore in a particular direction, the corresponding directional icon will turn gray.
- You can check the lens position using the display on the lower right of the screen.
4-3. Press <SET> when finished.
REFERENCE
- If you press the <CANCEL> button in step 4-3, the lens will move back to its position prior to adjustment.
- You can select [Camera Setup] > [Axis Shift] > [GUI Color] to change the color of the icons to [Yellow] or [Green] and then press <SET> to complete the setting.
- You can reset the position of the lens by selecting [Camera Setup] > [Axis Shift] > [Reset] > [OK]. Press <SET> to complete the setting.
NOTE
- The range of adjustment depends on the current zoom position.
- The more the lens position is adjusted, the bigger the deviation at the center of the picture will be during zoom. By centering on an object at full telephoto and then adjusting at full wide-angle, the amount of amount of deviation will be reduced.
Using the Focal Length Guide
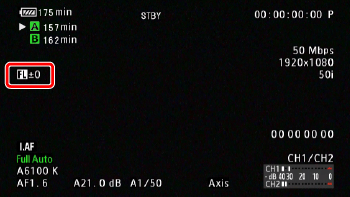
The focal length guide aids you when using two camcorders for 3D recording. The guide appears as a numerical value and has a range of 195 steps. You can set the guide to 0 at any point in the zoom range to help precisely calibrate camcorders.
1. Set up two camcorders.
- Set up the two camcorders parallel to each other.
- Align the picture angle of the two camcorders at full telephoto.
2. Set up the standard zoom position for the focal length guide.
2-1. Press the <MENU> button.
2-2. Select [Camera Setup] > [Zoom] > [Focal Length Guide].

2-3. Select [Set To 0] and then press <SET>.

2- 4. Press <MENU>.
The focal length guide appears on the left side of the screen as [  ±0].
REFERENCE
To turn off the indicator, select [Off] in step 2-3, and then press <SET>.
3. Adjust the zoom position.
- Operate the zoom on camcorders.
- If camcorders are set so that the same value is displayed during zoom, the focal length for camcorders will remain almost the same.
NOTE
- Although the focal length guide is an aid for 3D recording, make sure to check the picture angle visually while recording.
- You can obtain more accurate results when you perform this procedure at full telephoto.
- The same picture angle for camcorders cannot be guaranteed.
|