|
Wireless Setup Using Standard Setup
Before Starting Wireless Connection Setup
REFERENCE
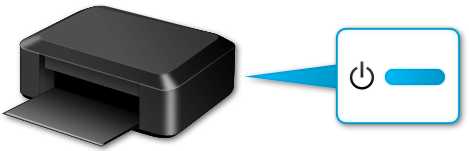
Make sure that the printer is turned on.
1. Press the HOME button (A) on the printer.

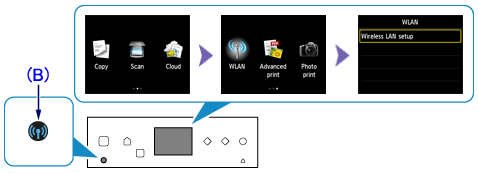
2. Flick the screen left or right, then tap the [ WLAN ].
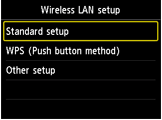
Tap [ Wireless LAN setup ].
The Wi-Fi lamp (B) flashes when wireless connection is enabled.
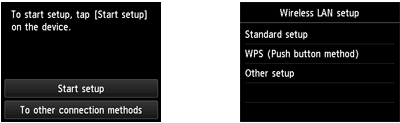
3.
When the screen left above is displayed, go to the step 4.
When the screen right above is displayed, go to the step 5.
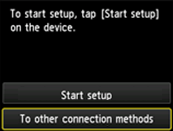
4. Tap [ To other connection methods ] on the printer.
5. Tap [ Standard setup ].
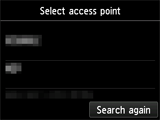
6. Tap your access point.
REFERENCE
If a different screen appears, see "If an Error Screen Appears" below in this page and follow the instructions there.
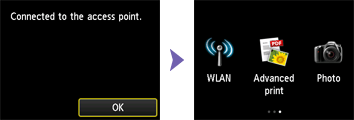
7. Either of the following screens should be displayed:
If [ Connected to the access point. ] appears on the printer, the network does not require a password.
REFERENCE
If a different screen appears, see "If an Error Screen Appears" below in this page and follow the instructions there.
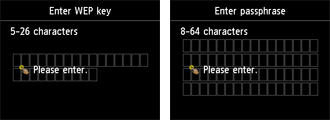
8. Tap the screen.
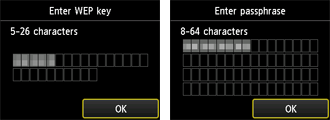
9. Enter the network password (WEP key or passphrase).
Character entry is case-sensitive so be sure to confirm.
REFERENCE
- Character Entry
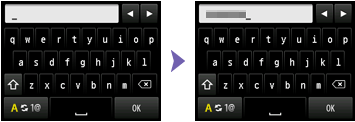
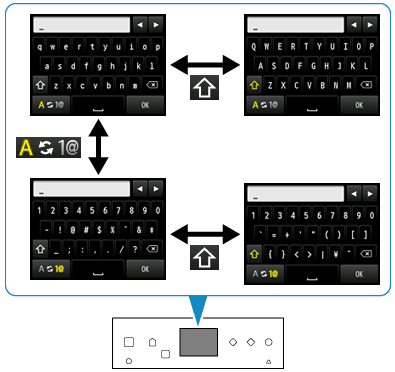
You can enter the characters when the keyboard is displayed on the printer. Follow the procedure below.
(1) You can enter the characters when the keyboard is displayed on the printer screen.
Character entry is case-sensitive.
 : Tap to switch between "lower case letters" and "numbers and symbols."
 : While letters of the alphabet appear, tap to switch between upper and lower case letters. While numbers and symbols appear, tap to switch symbol types.
 : Tap to insert a space.
 : Tap to delete the character at the cursor. Use  or  to move the cursor to the target character.
(2) Tap the character you want to enter.
(3) Repeat 1 and 2 to enter the remaining characters.
- To insert characters, move the cursor to the character on the right of the target position using the or and tap characters.
10. Tap [ OK ].
11. Make sure that the network password is correct.
Character entry is case-sensitive.
12. Tap [ OK ].
REFERENCE
If a different screen appears, see "If an Error Screen Appears" below in this page and follow the instructions there.
13. When the left screen appears, tap [ OK ].
REFERENCE
If a different screen appears, see "If an Error Screen Appears" below in this page and follow the instructions there.
The wireless LAN setup in the standard method is completed.
Install the software.
If an Error Screen Appears
- The Target Access Point is Not Detected.
Is the network device (router, etc.) turned on? If the network device is already turned on, turn it off, then turn it back on.
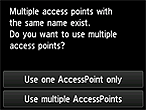
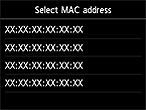
- Multiple access points with the same name exist.
The message appears when multiple access points with the same name are found.
- When you have only one access point.
Select [ Use one AccessPoint only ], then tap [ OK ].
Select the MAC address of the target access point on the displayed screen.
For details on how to check the MAC address of the access point, refer to the manual supplied with the access point or contact its manufacturer.
- When using multiple access points
Tap [ Use multiple AccessPoints ].
- An Unknown Access Point is Displayed.
Access points in use nearby may also be detected.
- The Access Point Name is Not Displayed Properly.
Access point names with double-byte characters are not displayed properly. However, they can be selected.
- The Access Point Name is Not Displayed Automatically.
Refer to the manual supplied with the access point or contact its manufacturer.
- The Network Password is Not Displayed Automatically.
Refer to the manual supplied with the access point or contact its manufacturer.
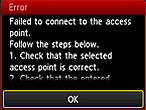
- When the security protocol is WPA/WPA2 and if "Failed to connect to the access point" is displayed
Make sure that the passphrase entered for the access point is correct.
- When the security protocol is WEP and if "Failed to connect to the access point" is displayed
Make sure that the WEP key entered for the access point is correct. In addition, when using WEP key number 2, 3 or 4 of the access point, set to use WEP key number 1, or select a WEP key number by entering wireless connection settings of the printer directly.
|