Operations for the scanned image edit window
When scanning has finished, a preview window of the scanned image will be displayed.
To display the edit window in the preview window, click  on the tool bar.

Scanned image preview screen
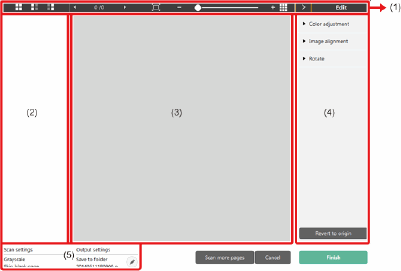
(1) Toolbar
This tool bar enables operations to thumbnails and preview images.
(2) Thumbnail Display Area
Thumbnails of the scanned documents will be displayed. You can implement the following operations.
Click a thumbnail to display a preview of the scanned image in the preview window.
Drag a thumbnail to change pages.
(3) Preview Area
The preview images of scanned documents are displayed.
(4) Edit window
You can edit scanned documents.
Click an item to open the edit window.
Click the [Restore] button to discard the edit results and return to the previous scan image.
[Color adjustment] (Easy Settings)
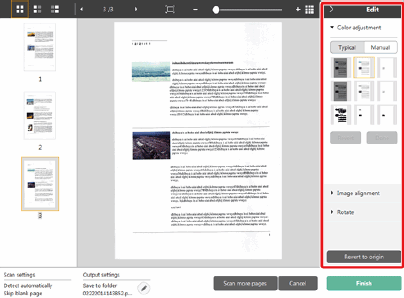
Click [Color adjustment] to display the default.
Click the button to toggle between the typical settings and manual settings displays.
Click a thumbnail in typical color adjustment to select the most suitable preview image that is displayed.
9 thumbnail patterns are displayed for the relevant image in color, and 6 patterns in grayscale.
When adjustment is finished, click the [OK] button. To cancel the adjustment, click the [Back] button.
[Color adjustment] (Manual settings)
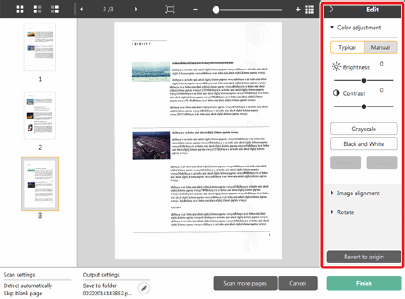
Move the slider to the left or right to adjust the brightness and contrast of the image, checking the preview image.
Click the [Grayscale] button to render the image in grayscale.
Click the [Black and White] button to render the image using 2 values: black and white.
When adjustment is finished, click the [OK] button. To cancel the adjustment, click the [Back] button.
[Image alignment]
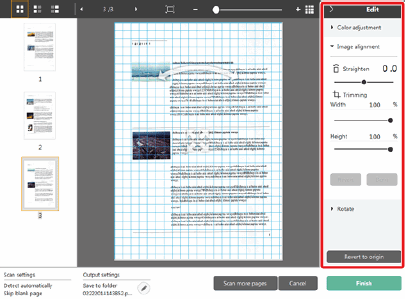
Click [Image adjustment] to display.
The preview image or the slider can be used for the straightening and the trimming.
In the preview image, drag the Move grip  , the Straighten grip
  and/or the trimming frame directly. To change the extend of the trimmed image, drag the Move grip
  on the preview.
When adjustment is finished, click the [OK] button. To cancel the adjustment, click the [Back] button.
[Rotate]
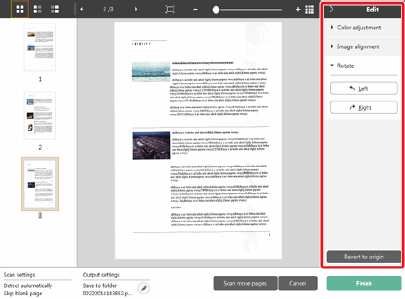
Click [Rotate] to display.
The scanned image can be rotated in 90 degrees to the left or the right.
The rotation can be adjusted accordingly to the preview image.
(5) Information Display Area
The information regarding the "Select document" and "Select output" is displayed.
Click the  button, and the Output Settings dialog will appear.
Click the [Scan more pages] button to continue scanning.
Clicking the [Cancel] button will destroy the scanned images and return to the top screen.
When clicking the [Finish] button, the ouptut processing will start. After it is completed, the screen will return to the top screen.
