You can print from Mac OS via USB or network connections such as Bonjour or IP. Install the software depending on your computer environment.
 If you install the software, log onto the computer as an administrator.
1. Download the correct model printer driver from our website (www.usa.canon.com).
2. Double-click on the downloaded file (to expand it) and then on the "iPF Printer Setup" icon.

3. Click Next.

4. If a screen requesting the name and password is displayed, enter the user name and password of a user with administrative rights and click OK (or Install Helper on OSX v10.7 or later).

5. Select the country or region where you are using the printer, and click Next.

6. Select the software to install and click Next.
Move the mouse pointer near the name of the software to display an overview of the software.

7. After reading the software license agreement, click Yes.

8. If you agree to the Extended Survey Program, click Agree.

9. If you can respond to the questionnaire, click Next.

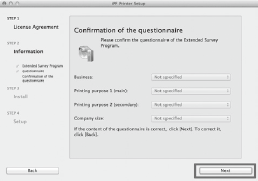
10. Confirm your questionnaire responses, and click Next.
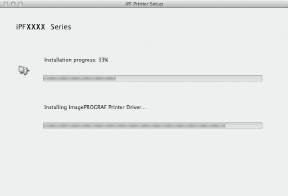
11. The progress of the installation is displayed.
Once all of the installation has finished, the screen automatically advances to the setup screen.
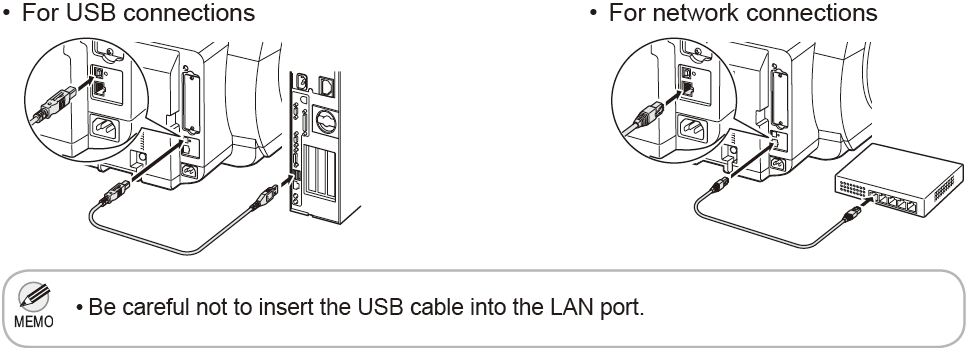
12. When the following screen is displayed, make sure that the printer is on, and then connect the printer to the computer by either USB or network cable.

13. Select the method of connecting to the printer, and click Next.
For USB connection, the printer is automatically added and you should proceed to step 17.

14. Click Add Printer.

 You can view a description of adding printers by click Help.
15. Select the printer to add from Default and click Add.

 - It may take a long time until the printer information is displayed on the screen.
- You can also add the printer by specifying the IP address by selecting IP.
16. Click Next.

17. Select the Execute media type update check box and click Next.

18. Click OK.

 If the same model of printer is already registered on the computer, a screen is displayed for printer selection. Select the desired printer and click Next.
19. Click Exit.

 The following screen is displayed while the media information is being updated.
Do not perform any other operations. When the media information has been updated, the screen is no longer displayed.

