|
In case of using Media Configuration Tool Ver.7.00or later. 1.From the Start menu, select All Programs > imagePROGRAF Media Configuration Tool > imagePROGRAF Media Configuration Tool. The Media Configuration Tool runs.
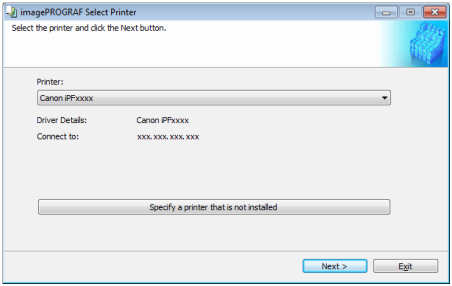
2.The Select Printer dialog box is displayed. Select the printer for which to configure the media information, and then click the Next button.
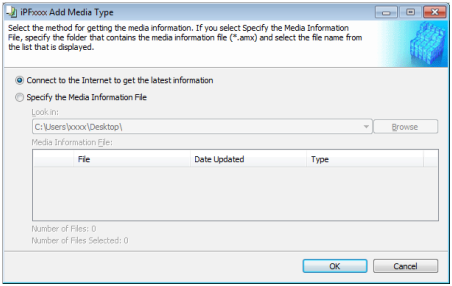
3.The Add Media Type dialog box is displayed. Make sure that Connect to the Internet to get the latest information is selected, and then click the OK button.
The latest media information file is downloaded from the Internet.
NOTE
- If the main window is displayed at this time, it means that the media information has already been updated and the rest of the operation is not needed.
IMPORTANT
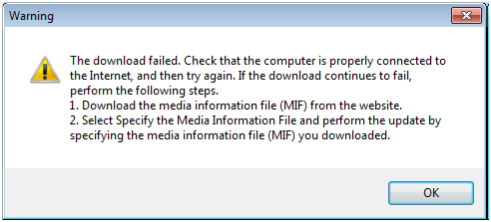
- If the following message is displayed
If this message is displayed, the media information file could not be downloaded automatically from the Internet. Configure the settings using the following procedure.
(1) Open a web browser on a computer that can access the Internet, and access the Canon website.
(2) Download the media information file (.amx file) corresponding to the printer you want to update from the Canon website.
(3) Copy the downloaded media information file (.amx file) to the computer where the Media Configuration Tool is installed.
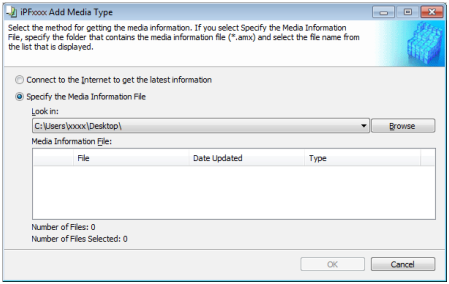
(4) Select Specify the Media Information File in the Add Media Type dialog box, and then click the Browse button.
(5) Select the folder that contains the media information file (.amx file), and then click the OK button.
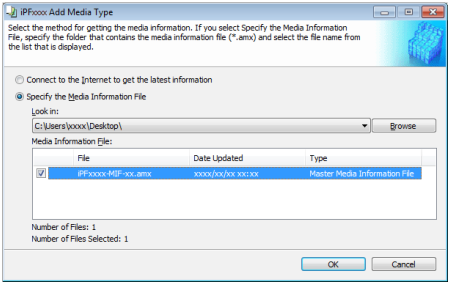
(6) The names of the media information files contained in the selected folder are displayed in the Media Information File field in the Add Media Type dialog box. Select the check box for the media information file name and click the OK button.
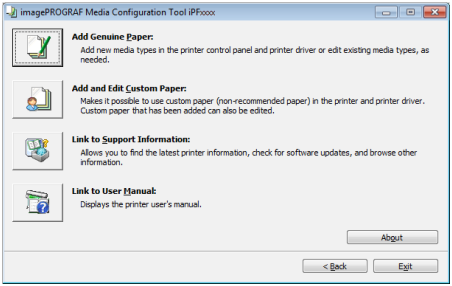
4.The Media Configuration Tool main window is displayed. Click the Add Genuine Paper button.
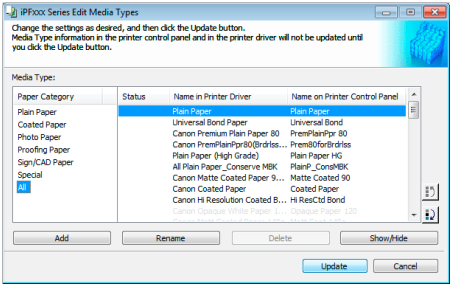
5.In the Edit Media Types dialog box, click the Update button.
6.The Confirm Update dialog box is displayed. Configure Update Target and click the Execute button. The printer control panel and printer driver media information is updated.

NOTE
- You should normally select Update the printer control panel and printer driver.
7.The following message is displayed.
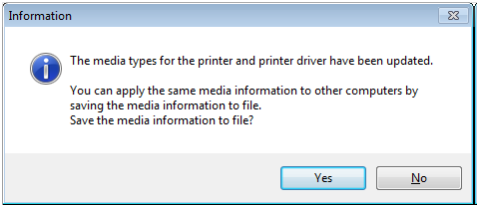
If you want to save the current media information in a file, click the Yes button. If you do not want to save it, click the No button.
NOTE
- The media information is saved as a media information file (.amx file).
- You can apply the same media information as the current computer on another computer by
In case of using Media Configuration Tool previous version than Ver.7.00. 1.From the start menu go to All Programs > iPFxxxx Media Configuration Tool > iPFxxxx Media Configuration Tool.
Media Configuration Tool main window is displayed.
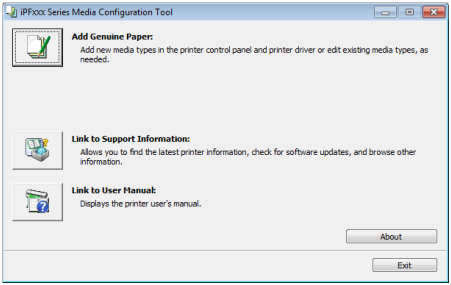
2.Click the Add Genuine Paper button.
3.The Select Printer dialog box is displayed.
Confirm the printer, where media type information is to be updated, to be displayed in Printer in the Select Printer dialog box, and then click the Next button.

Communication with the printer begins.
IMPORTANT
- Do not attempt to print or turn the printer off while the program is communicating with the printer.
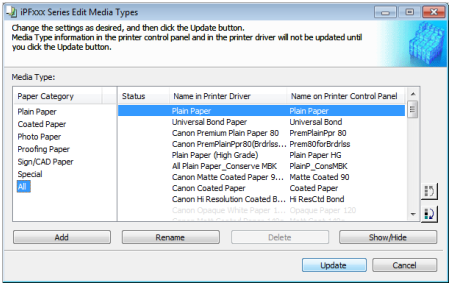
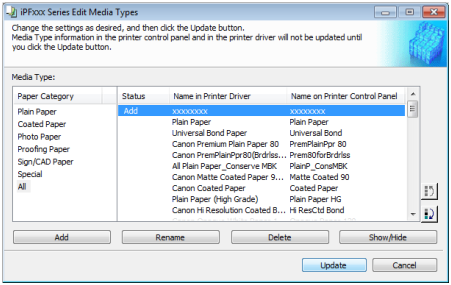
The Edit Media Types dialog box is displayed.
NOTE
- In the following screens, you cannot change the printer where media type information is to be updated.
NOTE
- Paper that is displayed grayed out does not appear in the printer driver or printer panel.
4.Click the Add button.
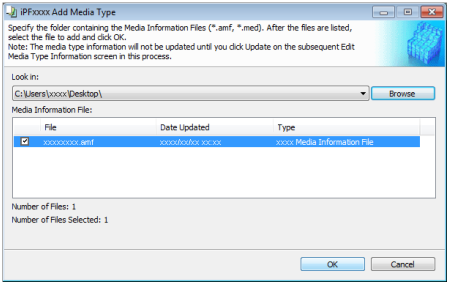
5.The Add Media Type dialog box displays.
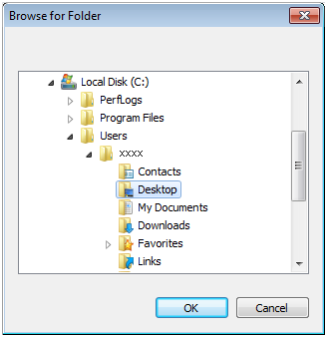
Click the Browse button.
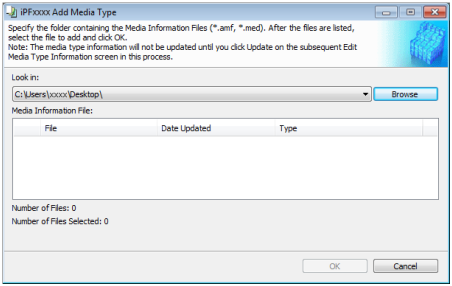
6.Open the folder that contains the media information files (.amf files).
7.The names of the media information files contained in the selected folder are displayed in Media Information File in the Add Media Type dialog box. Select the check box for the paper you want to add and click the OK button.
NOTE
- If Master Media Information File is displayed as the Type of the Media Information File, the media type display order and media type display/non-display settings are initialized. Reconfigure these after adding the master media information file.
8.Click OK when the confirmation message is displayed.
9.In the Edit Media Types dialog box, click the Update button.
10.The Confirm Update dialog box is displayed.
Configure Update Target and click the Execute button.
Communication with the printer begins.
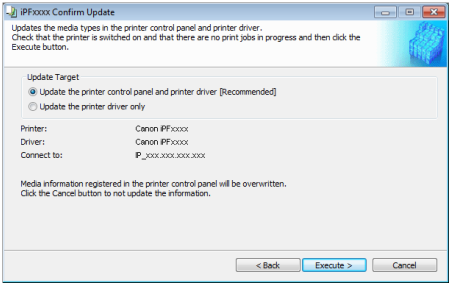
NOTE
- You should normally select Update the printer control panel and printer driver.
IMPORTANT
- When setting a data to the printer that differs from the data to be updated, the selected media information file is updated. When you would like to keep the data that is set on the printer, click the Cancel button.
- Do not attempt to print or turn the printer off while the program is communicating with the printer.
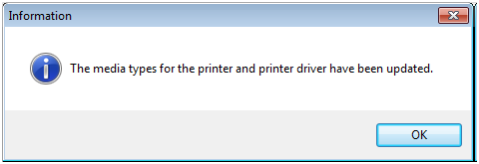
11.Click the OK button.
|