|
Loading Sheets in the Printer Follow these steps to load sheets in the printer.
IMPORTANT
- One sheet of paper can be loaded in the Paper Feed Slot at a time. Do not load more than one sheet at a time.
This may cause paper jams.
- Before feeding paper or printing, make sure the sheet is flat against the Roll Cover. The sheet may jam if it curls before feeding or printing and the trailing edge drops toward the front.
- Paper that is wrinkled or warped may jam. If necessary, straighten the paper and reload it.
- Load the paper straight. Loading paper askew will cause an error.
NOTE
- Store unused paper in the original package, away from high temperature, humidity, and direct sunlight.
1.Select sheets as the paper source.
- If a print job was received
Sheets are automatically selected, and the media type and size specified by the print job are shown on the Display Screen. Go to the next step.
- If no print job was received
(1)Press the Load button.
(2)Press  or  to select "Load Cut Sheet", and then press the OK button.
NOTE
- If any paper has been advanced that will not be used, a message is shown requesting you to remove it.
Press  or  to select Yes, and then press the OK button. Remove the paper and go to the next step.
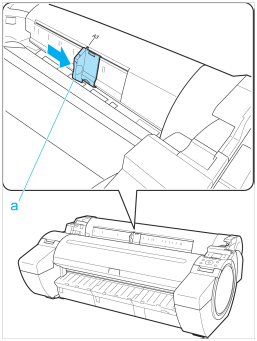
2.Slide the Width Guide (a) to align it with the mark for the size of paper you will load.
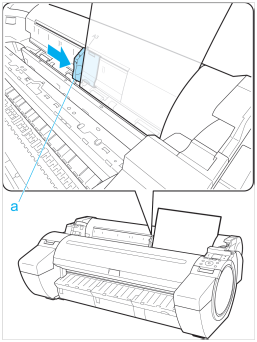
3.Load a single sheet printing-side up in the Paper Feed Slot, with the right edge aligned with the Paper Alignment Guide (a) to the right of the Roll Cover.
Insert the paper until the leading edge makes contact and you hear a tone.

NOTE
- Load the paper in the longitudinal direction.
4.Move the Width Guide (a) carefully to match the size of paper loaded.
Set the Width Guide against the edge of the paper to prevent the paper from becoming crooked or wrinkled.
5.Press the OK button.
- If a print job was received
The printer now starts printing the print job.
- If no print job was received
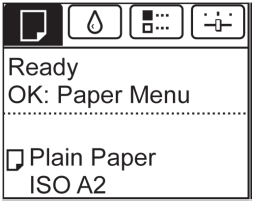
A menu for selection of the type of paper is automatically shown on the Display Screen.
Press  or  to select the type of paper, and then press the OK button. The printer now starts feeding the paper.
NOTE
- Refer to Paper Reference Guide for details on type of paper to select.
Removing Sheets Remove sheets from the printer as follows.
1.On the Tab Selection screen of the Control Panel, press  or  to select the Paper tab (  ).
NOTE
- If the Tab Selection screen is not displayed, press the Menu button.
2.Press the OK button.
The Paper Menu is displayed.
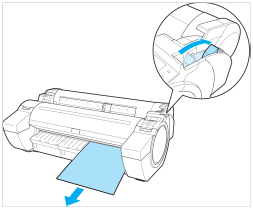
3.Press  or  to select Eject Paper, and then press the OK button. 4.Press  or  to select Yes, and then press the OK button. The paper is ejected from the front of the printer.
5.Holding the paper, push the Release Lever back and remove the sheet.
6.Pull the Release Lever forward.

|

