Make sure that the machine is turned on, lift the Scanning Unit (Printer Cover) with hands, then pull the Scanning Unit Support (A) down into place.
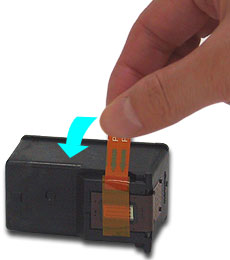
Take out a new cartridge from its casing and gently remove the orange protective tape in the direction of the arrow.
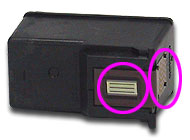
Note: - Do not attempt to reattach the protective tape once you have removed it. - Do not touch the gold electrical contacts or the print head nozzles after removing the protective tape.
Insert the ink cartridge into the ink cartridge holder.- Black: the left slot- Color: the right slot*
*One black cartridge and one color cartridge must be installed in the machine in order for the printer to operate. It does not matter if the capacities (Standard or High) do not match.
Push up on the front of the cartridge until it locks into place. (A click sound will be heard when the cartridge is locked in place.)
Confirm that the ink cartridges are installed properly.
<1> The ink cartridge is not installed properly.
<2> The ink cartridge is installed properly.
Fold the scanning unit support and close the scanning unit (printer cover).
Wait until the preparatory operation is complete; it takes about one to two minutes.