Replacing the Maintenance Cartridge (iPF710)
Important
- Do not remove the Maintenance Cartridge except to replace it.
- To prevent ink from leaking from a used Maintenance Cartridge , avoid dropping the cartridge or storing it at an angle. Otherwise, ink may leak and cause stains.
- Ink adheres to the top of the Maintenance Cartridge after it has been used. Handle the Maintenance Cartridge carefully during replacement. The ink may stain clothing.
- The remaining Maintenance Cartridge capacity is recorded on each printer. Do not install a used Maintenance Cartridge in another printer.
- Make sure no print jobs are in progress.
- Press the Menu button to display MAIN MENU.

- Press
 or
or  to select Maintenance, and then press the
  button.
- Press or to select Repl. maint cart, and then press the button.
- Press or to select Yes, and then press the OK button.
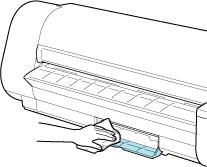
- At this point, open the Maintenance Cartridge Cover.
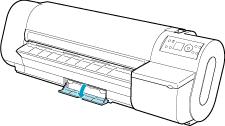
- Hold the handle (a) of the used Maintenance Cartridge and pull out the cartridge. Grasp the handles on sides (b) and keep the cartridge level as you remove it.

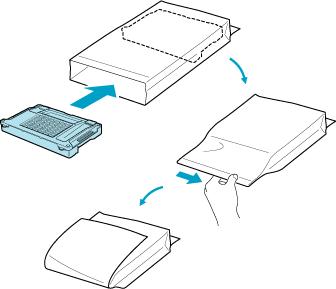
- Keeping the used Maintenance Cartridge level, insert it in the plastic bag of the new Maintenance Cartridge . Expel excess air and seal the zipper. After making sure the zipper is firmly sealed, fold the bag in two.
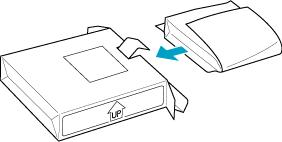
- Confirm the Maintenance Cartridge is right-side up, put it in the box, and store it so that it stays level.
- Wipe away any soiling on the Maintenance Cartridge Cover.
- Holding the handles on sides of the new Maintenance Cartridge (a), insert it completely, keeping it level.

- Close the Maintenance Cartridge Cover.

- Press the OK button.

After about five seconds when initialization is finished, a message prompts you to replace the Shaft Cleaner .
- Press or to select Yes, and then press the OK button.
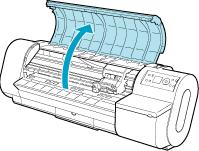
After the Carriage is moved, the Display Screen indicates Open Top Cover.
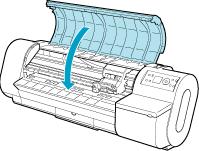
- Open the Top Cover.
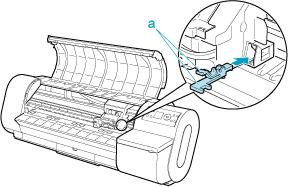
- Hold the Shaft Cleaner on the right side of the Carriage by the grips (a) and pull it toward you to remove it.

- After removing the cap of the new Shaft Cleaner , hold it by the grips (a) and attach it to the Carriage. Push the Shaft Cleaner until it clicks into place.
- Close the Top Cover.