Press or to select Replace P.head, and then press .
Press or to select Printhead, and then press .
Press or to select Yes, and then press OK. After about three minutes, Open UpperCover is shown on the Display Screen.
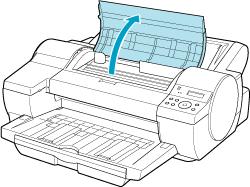
Open the Top Cover.
Pull the Printhead Fixer Lever of the Printhead forward all the way to open it completely.
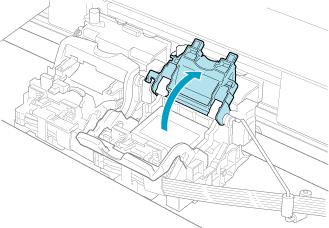
Pull up the Printhead Fixer Cover to open it completely.
Remove the used Printhead.
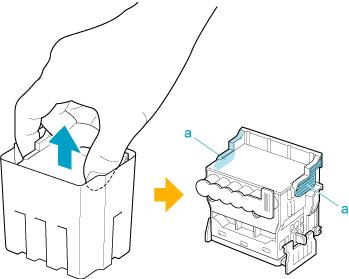
Holding the new Printhead by the grips (a), remove it from the case.
While firmly holding the Printhead you have removed, use your other hand to remove the orange Safety Cap 1 (a). Squeeze the grips (c) of Safety Cap 2 (b) and pull it down to remove it.
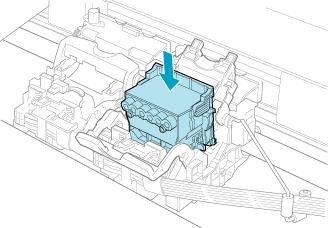
With the nozzles facing down and the metal contacts toward the back, insert the Printhead into the Carriage. Carefully push the printhead firmly into the Carriage , ensuring that the nozzles or metal contacts do not touch the carriage.
Pull the Printhead Fixer Cover down toward the front to lock the Printhead in place.
Push the Printhead Fixer Lever toward the back of the printer until it clicks.